
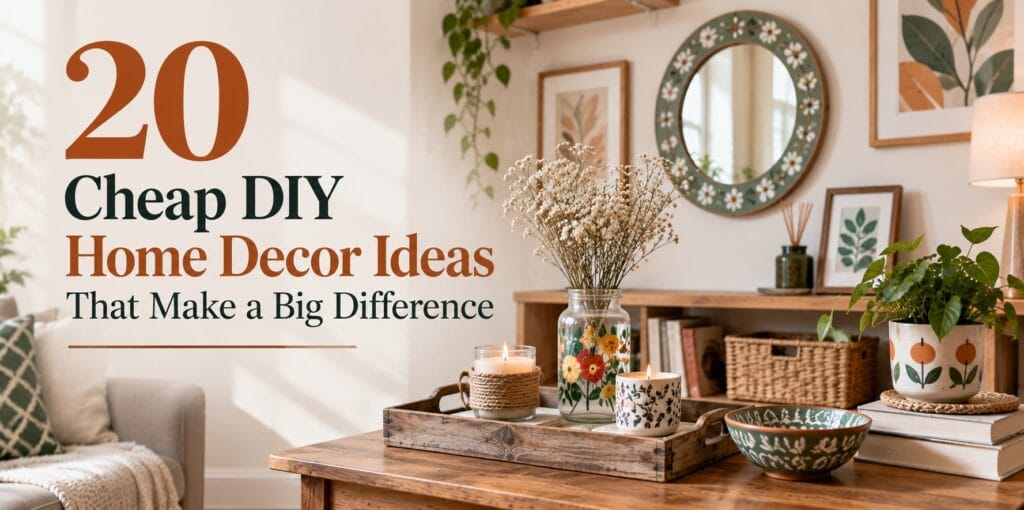
Cheap DIY home decor works best when you improve one visible spot with materials you already own. Painted jars, refreshed planters, simple wall art, storage baskets and carefully arranged trays can make a living room, bedroom or entryway feel more intentional without replacing furniture. These 20 projects include materials, basic steps and finishing tips. Start with the project that solves a real problem in your home, check that each product suits its surface, and choose portable, reversible changes if you rent.
Quick Takeaway: Best Cheap DIY Home Decor Ideas and Where to Start
For the biggest visual change on a small budget, start with one high-impact surface or zone rather than the whole room. Choose a shelf, entryway, or table; measure the space, gather what you already own, and finish one small project before buying more supplies. Painted jars, refreshed planters, simple wall art, upgraded baskets, and styled trays are beginner-friendly because they reuse inexpensive items and need only basic tools. Choose one color palette, repeat two or three materials, and prioritize a neat finish over adding more decor.
Which Cheap DIY Decor Project Should You Start With?
Start with the project that solves a real decorating problem using supplies you already own. If you have little time, restyle a tray or shelf; if you want a noticeable change, make coordinated wall art or repaint a planter. The best option depends on your space, skill level, rental rules and whether the finished piece will be easy to clean and use.
| Your situation | Best first project | Check before you begin |
|---|---|---|
| No new purchases | Restyle an existing shelf or catch-all tray (#9 or #20) | Remove clutter first; leave everyday items accessible. |
| Small apartment or rental | Painted jar vase or fabric-covered basket (#1 or #10) | Keep the project portable; check lease terms before altering walls. |
| Beginner with one afternoon | Painted planter or simple framed art (#4 or #12) | Choose paint suited to the surface and allow proper drying time. |
| Home with children or pets | Secure basket or unlit decorative tray (#10 or #18) | Avoid small loose pieces, unstable glass and reachable button batteries. |
A One-Hour Starter Plan for Budget Home Decor
This is an illustrative setup plan, not a promise that paint or glue will cure in an hour. Pick a project that uses dry, existing objects if you need a same-day result; leave painted pieces to dry for the time stated on the product label.
- Minutes 0–10: Choose one shelf, table or entryway surface and remove everything from it.
- Minutes 10–20: Gather three useful items you already own, such as a tray, small vase and framed print. Check sizes before placing them.
- Minutes 20–35: Clean the surface and arrange the largest item first, then add one medium and one small accent.
- Minutes 35–50: Step back, check walking space and access to drawers, and remove anything that feels crowded.
- Minutes 50–60: Photograph the result and note whether one future DIY project would genuinely improve it.
Example: In a rented studio, a clean entryway tray, an existing framed print and a small plant can create a coordinated welcome area without drilling or repainting. If you are planning more changes to a rental, compare these reversible bedroom decor ideas for renters before buying permanent fixtures.
Safety and finish check: Read product labels before using paints or adhesives; ventilate work areas and let finishes cure fully. Use battery-operated lights instead of open flames near paper, paint or fabric, and secure heavy or fragile decor. The linked EPA and U.S. Fire Administration guidance later in this article provides further details.
Three Real-Home Examples: Pick a Project That Fits
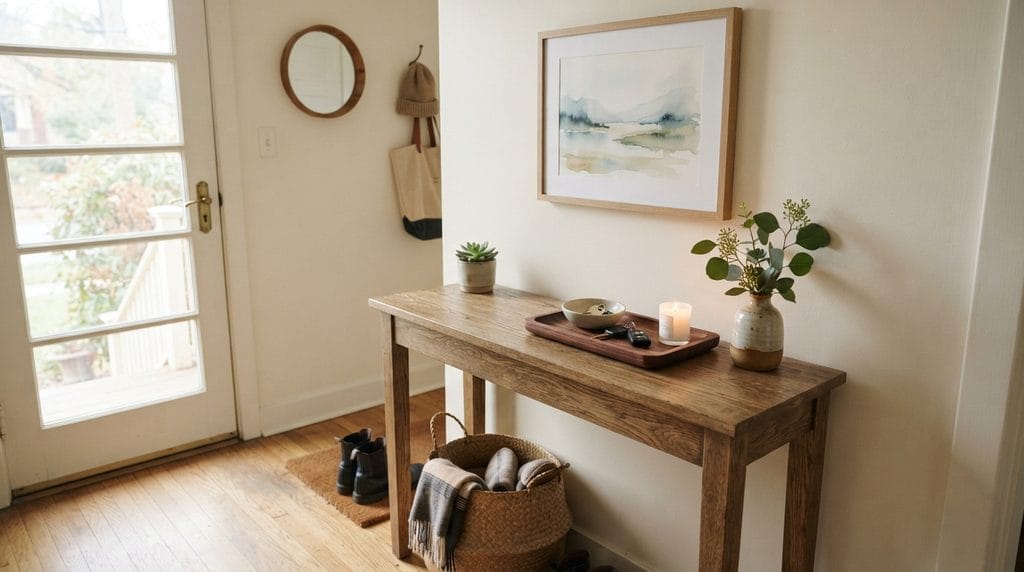
Renter with no drilling allowed: Refresh a small entryway using an existing tray, a bowl for keys and one lightweight framed print on a stable surface. Keep the door swing clear; skip adhesive wall hooks unless your lease and the product instructions allow them.
Family living room with young children: Start with a sturdy fabric-lined basket for throws or toys rather than loose glass ornaments. Choose a secure location away from walkways and keep small decorations, cords and accessible batteries out of reach.
Small room with no shopping budget: Remove unused items from one shelf, group a few objects you already own at different heights, and leave some empty space. Take a photo before buying supplies; a better arrangement may be enough.
Quick decision: Restyle first when you want an immediate, reversible change. Choose painting or adhesives only when you have a suitable surface, ventilation, materials and enough time for the finish to dry or cure according to its label. These are illustrative setups, not verified cost savings.
How Much Should You Budget for One DIY Decor Project?
Short answer: Start with a no-spend rearrangement. If you need supplies, set a maximum for one project and price every required item before buying. A jar you already own is not necessarily a cheap project if you must purchase paint, primer, brushes and a sealant.
| Spending approach | Good first project | Check before starting |
|---|---|---|
| No new purchases | Restyle a shelf, tray or book stack | Reuse existing objects; check stability and access. |
| Buy one missing supply | Refresh a planter or frame | Confirm the paint or adhesive suits the surface. |
| Buy several supplies | Make coordinated art or a textured finish | Add up all materials, tools and delivery before committing. |
Worked example: planning a $15 materials cap
Imagine a hypothetical $15 limit for refreshing a planter. If suitable paint costs $6, a brush $4 and a compatible finishing product $3, the materials total $13, leaving $2. These are example numbers for doing the maths, not current shop prices or a recommendation to use every product. If you already have a usable brush, the same illustrative total becomes $9. Check the actual product labels: some surfaces need different preparation, and some finishes are unnecessary.
Before shopping, write down what you own, what you genuinely need, the local price of each item, and the drying or curing time. If the total exceeds your cap, choose a simpler project rather than cutting corners on safe materials. For a rental, favour portable pieces over wall alterations.
Choose DIY Materials That Suit the Surface
Short answer: A DIY project stays budget-friendly only when the paint, adhesive and finish suit the object you already own. Read the manufacturer’s surface-preparation, ventilation and curing instructions before buying. If a small item needs several specialist products, a no-paint restyle may be the more practical option.
| Object or surface | Check before starting | Avoid |
|---|---|---|
| Glass jar or ceramic vase | Use a coating labelled for that surface; clean it and allow the full cure time. | Assuming decorative paint is food-safe or waterproof. |
| Wooden frame or shelf accent | Check the existing finish, surface preparation and paint compatibility. | Painting over dirt or peeling finishes. |
| Fabric-lined basket | Dry-fit the liner and check fabric/adhesive compatibility. | Blocking handles or permanently gluing a liner that needs washing. |
| Bathroom tray or planter | Choose moisture-suitable materials and preserve drainage holes. | Unsealed paper or ordinary indoor finishes in wet areas. |
| Paper art or dried flowers | Keep stable, dry and away from heat; use flameless lighting. | Open flames near combustible decor. |
Can I use ordinary craft paint on a glass jar?
Not automatically. Choose a product explicitly suitable for glass, follow cleaning and curing instructions, and keep the jar for display unless every material is rated for its intended food or drink contact. A finish may scratch or wash off even when it looks dry.
Should I glue fabric permanently inside a storage basket?
Usually not if you expect to wash it. Try a removable, neatly folded liner first. If adhesive is necessary, confirm compatibility with both materials, follow curing directions and keep handles and ventilation openings clear.
Which DIY decor is easiest to maintain in a damp room?
Choose wipe-clean, moisture-suitable containers and simple trays. Keep drainage holes open in planters and avoid unsealed paper or absorbent fabric where it may get wet. If a finish needs frequent repair, a plain existing container may be more practical.
Renter example: For a small bathroom, compare decorating an existing washable tray with painting three jars. The tray may need no new supplies; the jars may require suitable coating, brushes and additional curing time. Choose based on maintenance, budget and product labels, not just a photo. See the EPA’s indoor-air guidance for ventilation precautions with paints and adhesives.
20 Cheap DIY Home Decor Projects: Materials, Steps and Styling Tips
1. Glass Jar Minimalist Vases
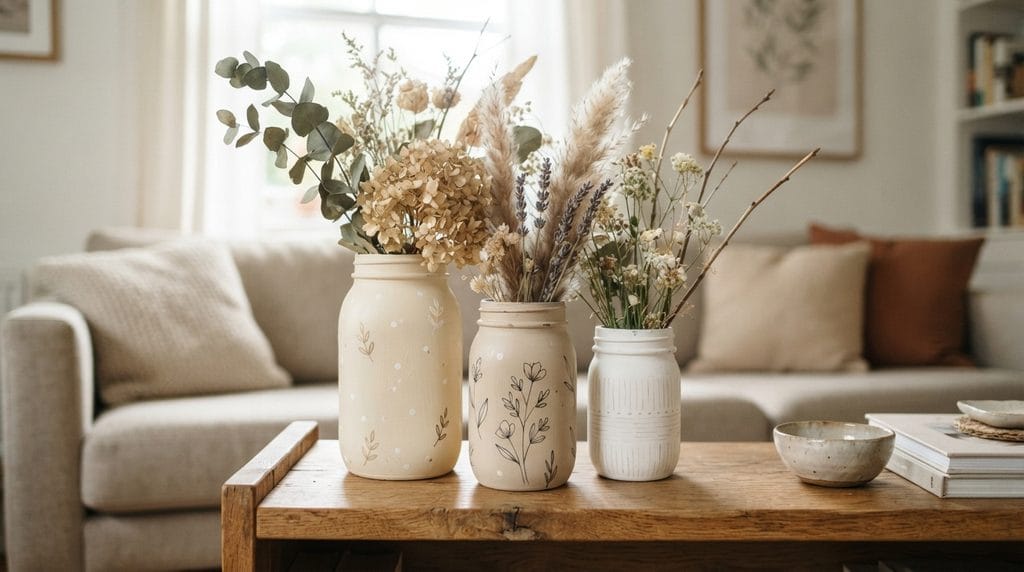
Clean, empty glass jars can become attractive display vases with a suitable finish. Choose a coating specifically labelled for glass and follow its cleaning, application and full curing instructions; ordinary craft paint may not adhere well. Keep any painted jar for decorative use unless every material is explicitly rated for food contact. Add dried flowers only after the finish has cured. Warm white, cream or muted pastel colours work well together. For more inspiration, see Lowe’s jar-vase project examples.
What You’ll Need
- Clean glass jars
- Paint explicitly labelled for glass
- Small paintbrushes
- Dried flowers or greenery
- Optional decorative details
Quick How-To
Wash and dry the jars thoroughly, then apply thin coats of a finish specifically labelled for glass, following its instructions for drying and curing. Add optional details only with compatible products and keep the finished jar for decorative use unless all materials are rated for food contact. Add dried flowers after the finish has fully cured.
Styling Tip
Group two or three jars at different heights, leaving some space between them. This makes the arrangement feel intentional.
2. Textured Candle Holders
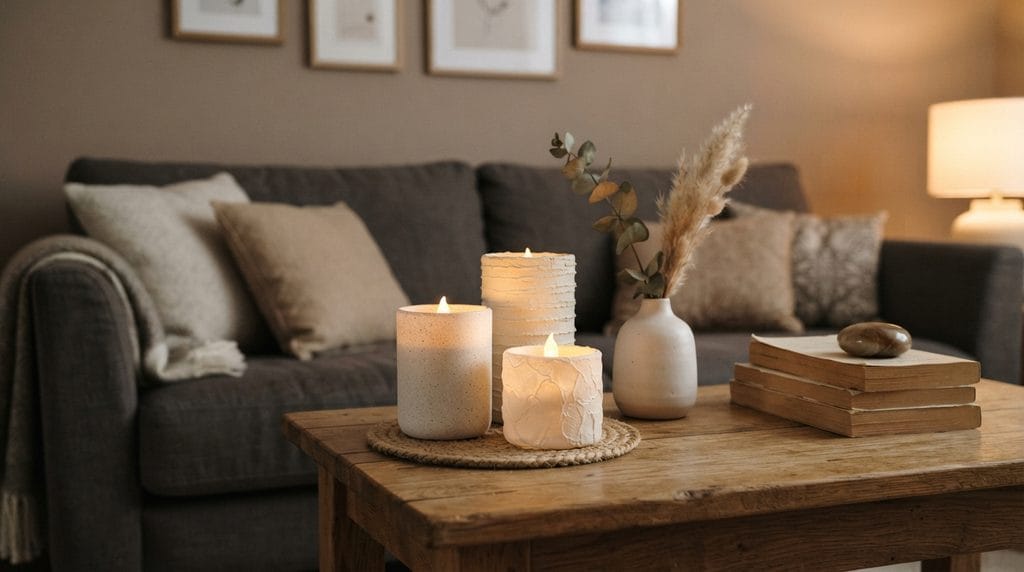
Plain glass candle holders can become decorative accents with texture and paint. Soft ivory or cream finishes give them a simple, elegant look. Add raised details, subtle brushwork, or small painted patterns to make each holder slightly different.
What You’ll Need
- Plain glass candle holders
- Cream or ivory craft paint
- Texture medium
- Small paintbrush
- LED tea lights
Quick How-To
Apply a thin layer of texture medium to the outside of the holder and let it dry completely. Paint over the texture with your chosen color, then add small hand-painted details if desired.
Styling Tip
Group holders of different heights on a stable surface. Choose battery-operated LED tea lights instead of open flames near painted finishes, paper, or fabric. The U.S. Fire Administration recommends flameless candles as a safer alternative.
3. Picture Frame Decorative Tray
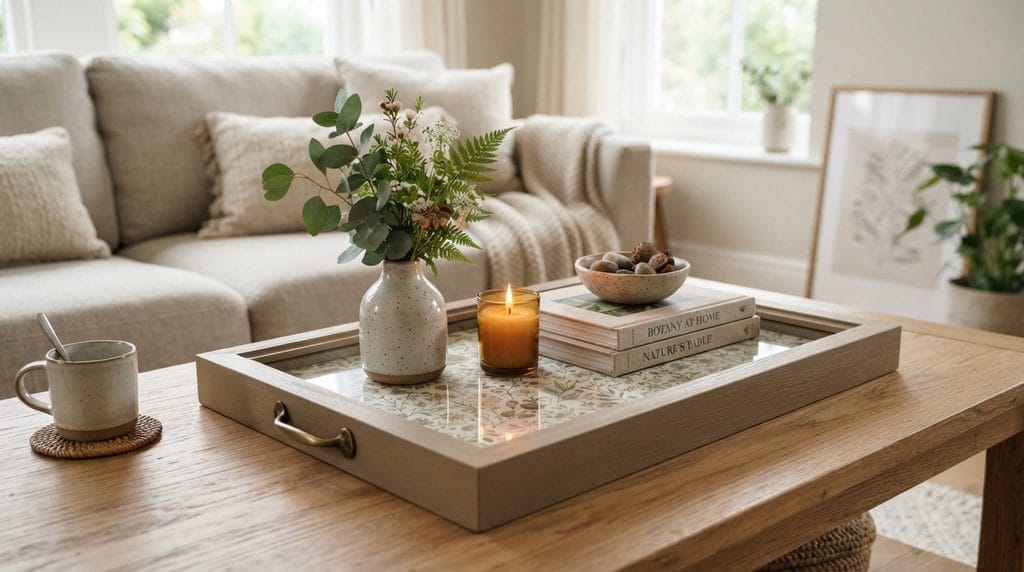
Turn a sturdy picture frame into a lightweight display tray by lining its backing with decorative paper or fabric. Use it only for small, lightweight objects; ordinary picture frames are not designed to carry drinks or heavy items. Decorative trays can also group battery-operated LED candles, plants, and other small accents into a more intentional display without placing an open flame near paper or fabric. Lowe’s home accents section includes examples of this type of tabletop styling. Photo note: The pictured candle is styling inspiration, not a recommended setup; use a battery-operated LED light for a paper-lined frame display.
What You’ll Need
- Wooden picture frame
- Decorative paper or fabric
- Glue
- Optional felt pads for a stationary display
- Paint
Quick How-To
Remove the glass if the frame design allows it, or protect sharp edges while working. Paint the frame only with a finish suitable for its material and let it cure. Cut a paper or fabric insert to fit behind the glazing or backing, then reassemble securely. Keep this as a stationary display for lightweight objects, not a carrying or serving tray; decorative handles do not make an ordinary frame load-bearing.
Styling Tip
Use the tray to group a battery-operated LED candle, a lightweight vase, a small bowl, or coffee-table accessories. Avoid open flames near painted frames, paper, or fabric, and keep the arrangement stable.
4. Painted Planter Makeover
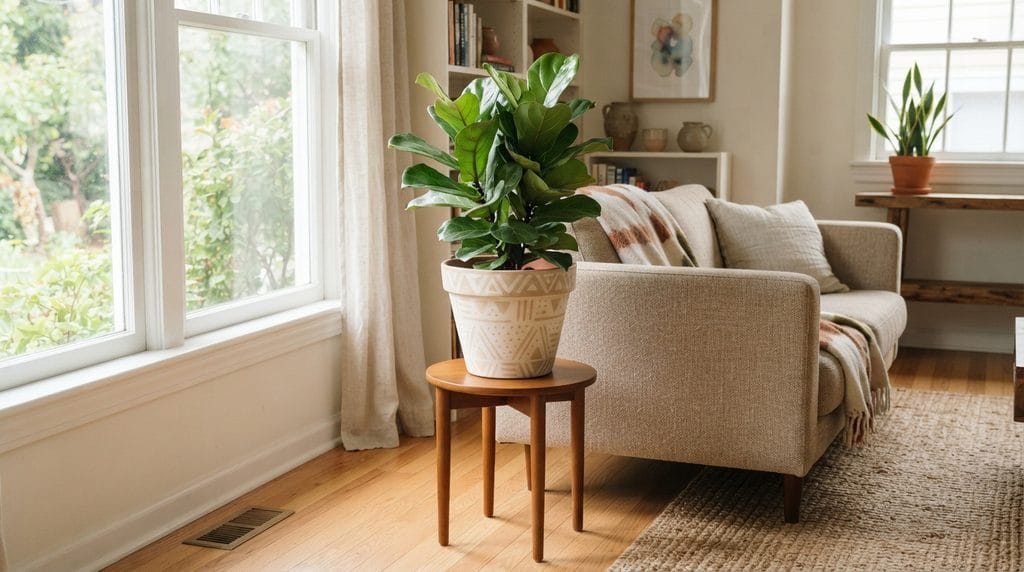
A basic planter can look completely different after a careful paint refresh. Choose cream, beige, or soft gray, then add a subtle pattern or texture. For living plants, keep drainage holes clear and choose a finish suitable for the planter material.
What You’ll Need
- Plain planter
- Matte paint
- Paintbrush
- Optional texture medium
- Faux or real plant
Quick How-To
Wash the planter and let it dry completely. Choose paint labelled for the planter material, then apply the number of thin coats recommended on the label, allowing the stated drying time between coats. Keep drainage holes clear, and let the finish fully cure before putting a living plant back in the pot. Add decorative details only with compatible materials.
Styling Tip
Vary the sizes of the planters around the room but maintain the same color scheme.
5. Rope-Wrapped Vase
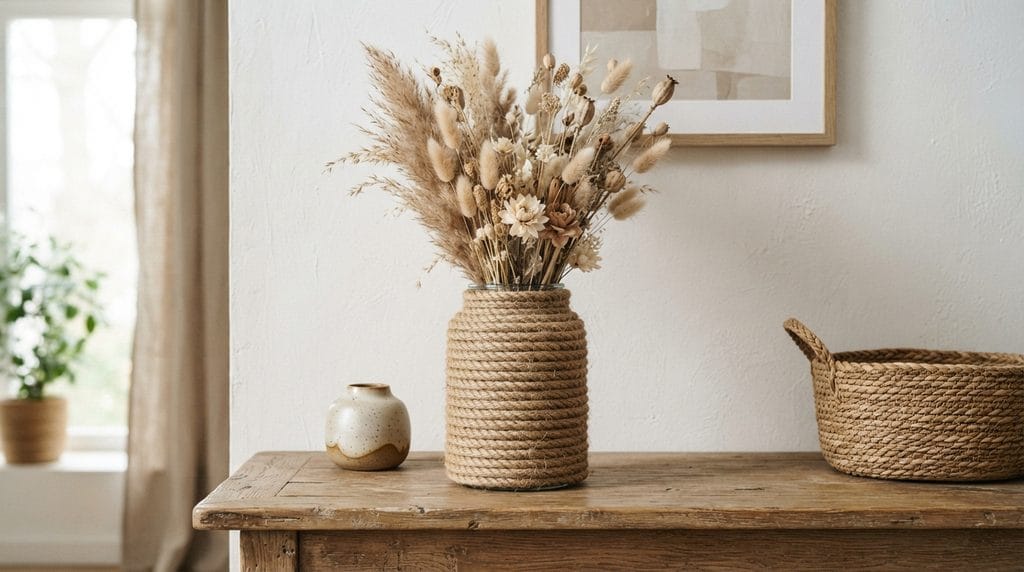
Natural rope makes a container look interesting, particularly in neutral and rustic designs. Choose a clean, dry container and a craft adhesive suitable for its material.
What You’ll Need
- Glass or plastic container
- Natural jute rope
- Craft adhesive
- Scissors
- Dried flowers
Quick How-To
Dry-fit the rope first to see how much you need. Apply a small amount of adhesive labelled for the container surface, then wind the rope evenly from the base upward, pressing gently as you go. Keep the rim and base usable, and allow the full curing time stated on the adhesive label before adding dried stems. Avoid placing rope near open flames or high heat.
Styling Tip
Combine the rope vase with wooden accessories and woven baskets for a natural and warm ambiance.
6. Faux Ceramic Decorative Bowl
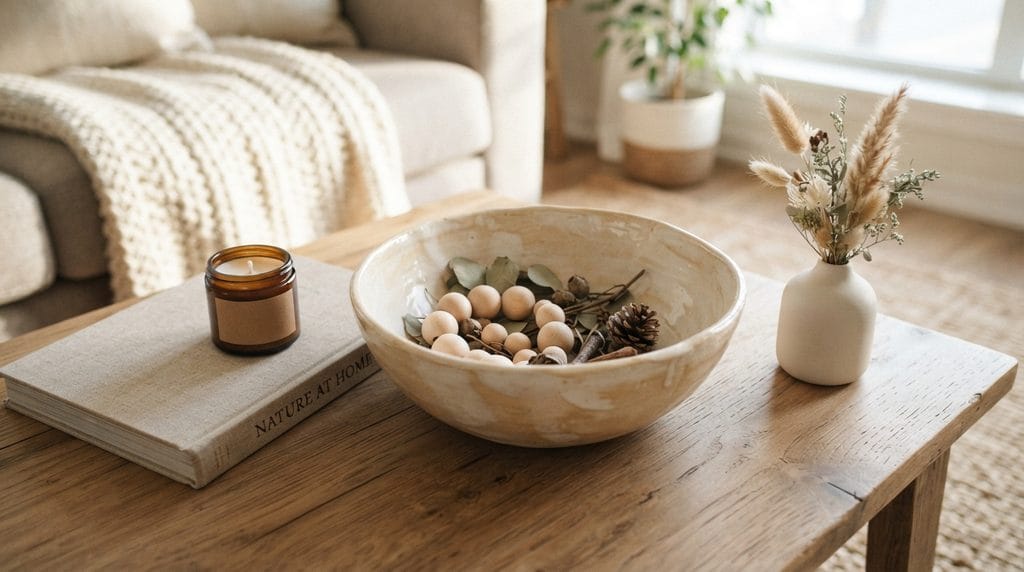
Paint and texture can be used to make a simple, inexpensive bowl look handmade.
What You’ll Need
- Plain decorative bowl
- Matte paint
- Texture medium
- Small brush
- Large decorative accents (optional)
Quick How-To
Apply a thin layer of craft texture medium and let it dry. Paint the bowl in a warm neutral color, then lightly distress the dry finish if desired. Keep it for decoration only unless all materials are specifically rated for food contact.
Styling Tip
Use just a few larger decorative pieces or dried stems, and keep the bowl stable on a level surface. Avoid loose beads or other small fillers within reach of young children or pets. This textured finish is decorative only, not automatically safe for serving food or holding liquids.
7. Painted Mirror Makeover
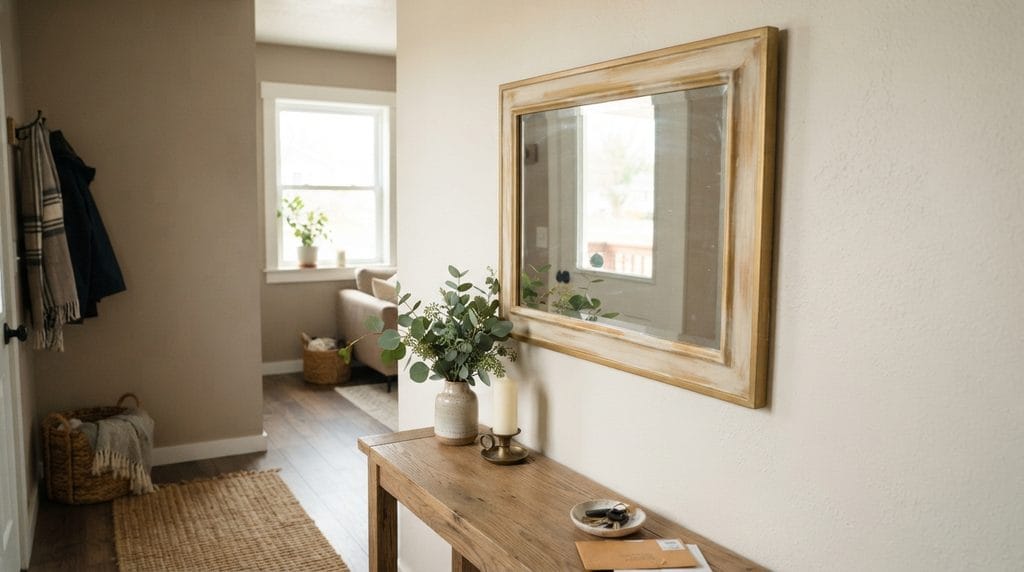
With a new frame finish, an inexpensive mirror can be a show-stopper decorative item. Use warm cream, muted gold, terracotta, black, or a blend of soft shades for your room. For more ways to use mirrors in a smaller space, see these mirror wall decor ideas for a small living room.
What You’ll Need
- Small framed mirror
- Paint
- Fine paintbrush
- Painter’s tape
- Optional texture medium
Quick How-To
Mask the mirror glass, clean the frame, and apply a finish suitable for the frame material. Let the paint cure according to its label before removing the tape, and use appropriate mounting hardware if you hang the mirror.
Styling Tip
Position the mirror above a console with secure wall fixings, then style the surface with a small vase and an LED candle. Renters should check their lease before drilling.
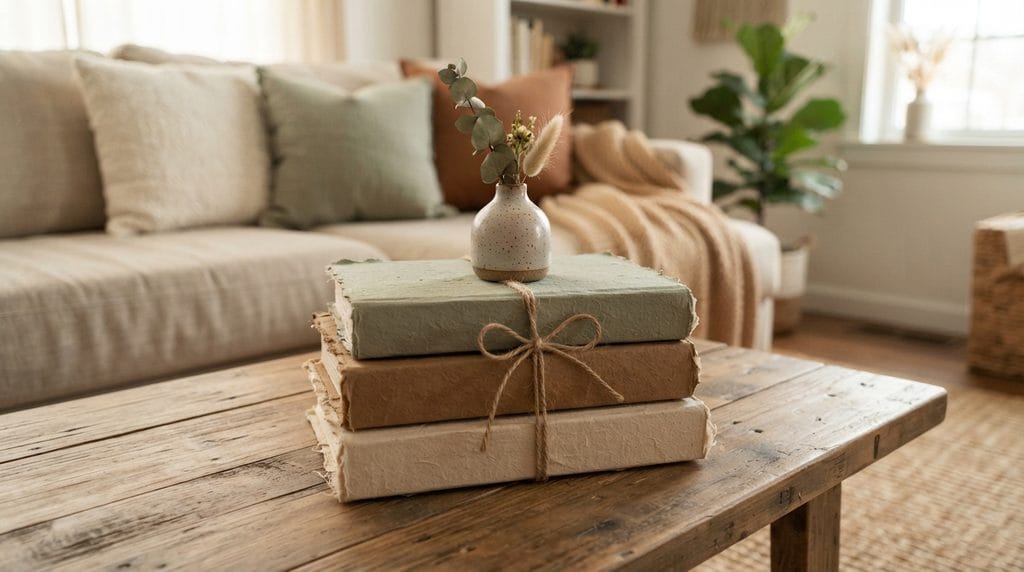
8. Decorative Book Stack
Although books can enhance the height and character of a shelf or coffee table, inexpensive books can be decorated.
What You’ll Need
- Old or inexpensive books
- Decorative paper or fabric
- Glue
- Ribbon or twine
- Optional labels
Quick How-To
Cover two or three inexpensive books with coordinated neutral paper or fabric, then stack them neatly to add height to a shelf or coffee-table display.
Styling Tip
Add a small vase, a battery-operated LED candle, or another lightweight decorative object to create a layered effect. Keep the arrangement stable and away from the table edge.
9. Entryway Catch-All Tray
A small entryway feels calmer when keys and everyday essentials have one landing place. Put a tray on a stable surface outside the door swing and keep it to keys, mail and one small accent. If your front door opens straight into the living room or you have no closet, see our small apartment entryway ideas with no closet before adding a bulky table.
What You’ll Need
- Small decorative tray
- Small bowl
- Battery-operated LED candle (optional)
- Small plant or vase
Quick How-To
Set a tray on the entryway table, add a bowl for keys, and leave space for one or two small accents. Keep the door swing and walking path clear.
Styling Tip
Make it functional and attractive at the same time. Even if you have a beautiful entryway, it needs to be usable on a day-to-day basis.
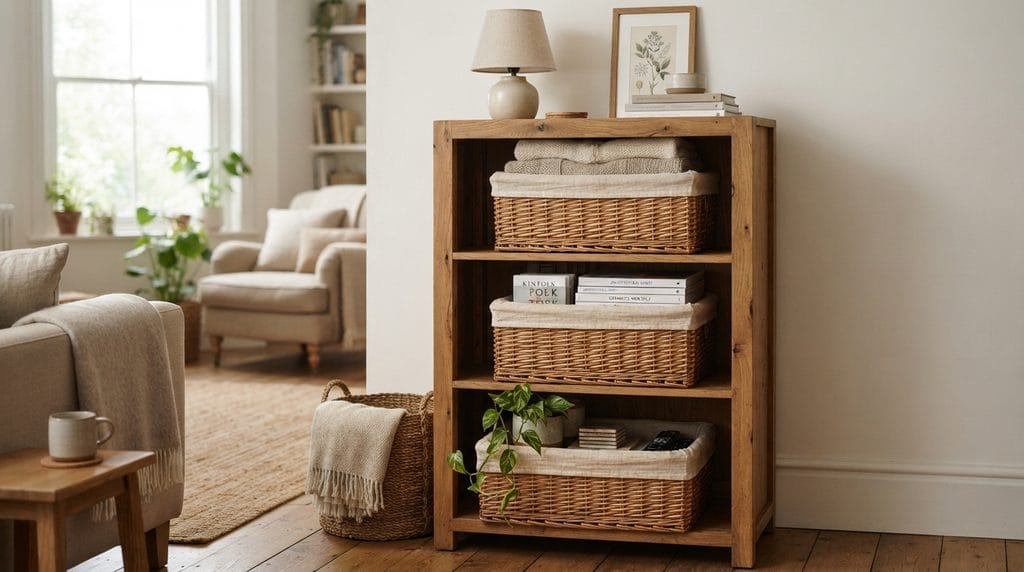
10. Fabric-Covered Storage Baskets
Storage doesn’t have to be dull. Fabric and basic decorative elements can soften basic baskets. For more practical storage ideas, see the room-by-room small apartment organization checklist.
What You’ll Need
- Storage basket
- Neutral fabric
- Scissors
- Fabric adhesive
- Optional ribbon or handle
Quick How-To
Measure the basket’s inside rim, height and handles, then cut a washable liner with a little extra fabric for a neat fold. Dry-fit it before deciding whether any fastening is needed. A removable liner is easier to clean than permanently glued fabric; if you use adhesive, follow its surface and curing instructions and leave handles and ventilation openings clear.
Styling Tip
Keep matching baskets on open shelves for a more streamlined and organized look.
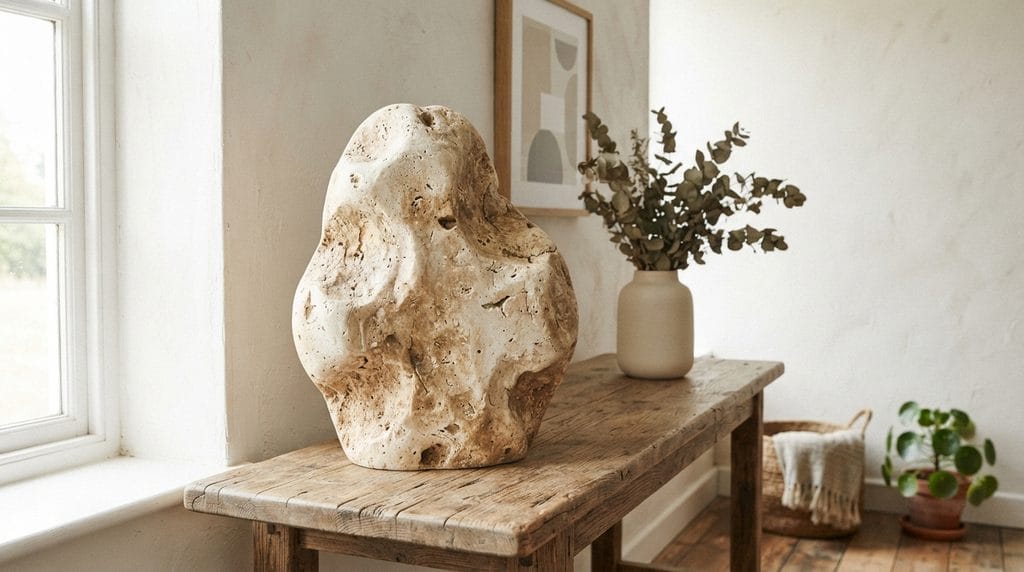
11. Faux Stone Decor
Introduce the look of natural stone without buying a heavy or expensive sculpture. Finish a lightweight decorative object with texture medium and neutral paint for a similar visual effect.
What You’ll Need
- Plain decorative object
- Textured craft medium
- Neutral paint
- Small brush
Quick How-To
Clean and dry a lightweight decorative object, then test the texture medium on a hidden area. Apply a thin, even layer according to the label and allow it to dry fully before painting with a compatible neutral finish. Work in a ventilated area, avoid creating dust while sanding, and keep the finished object stable and out of the reach of young children.
Styling Tip
For a more natural stone look, use ivory, beige, warm gray, or muted brown.
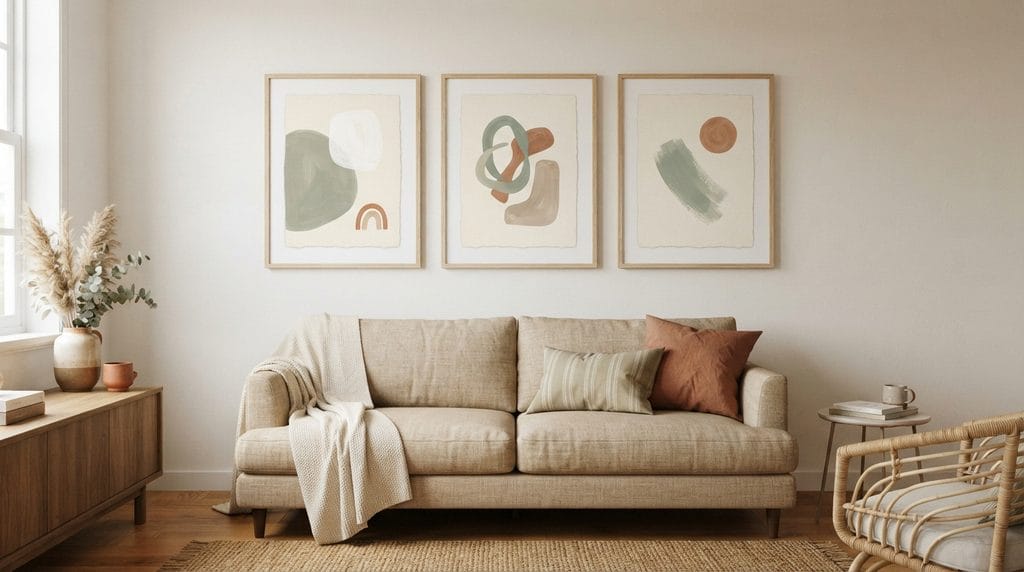
12. DIY Neutral Wall Art
A blank wall does not need an expensive gallery. Make a simple abstract piece with two or three coordinated colors and display it in an existing frame. You can also explore these stunning home decor ideas for more ways to make inexpensive pieces look polished.
What You’ll Need
- Canvas or sturdy paper
- Paint
- Paintbrushes
- Frames
Quick How-To
Make basic abstract forms with two to three complementary colors. Allow the artwork to dry prior to putting in frames.
Styling Tip
Instead of making one long and complicated artwork, make a set of three related pieces.
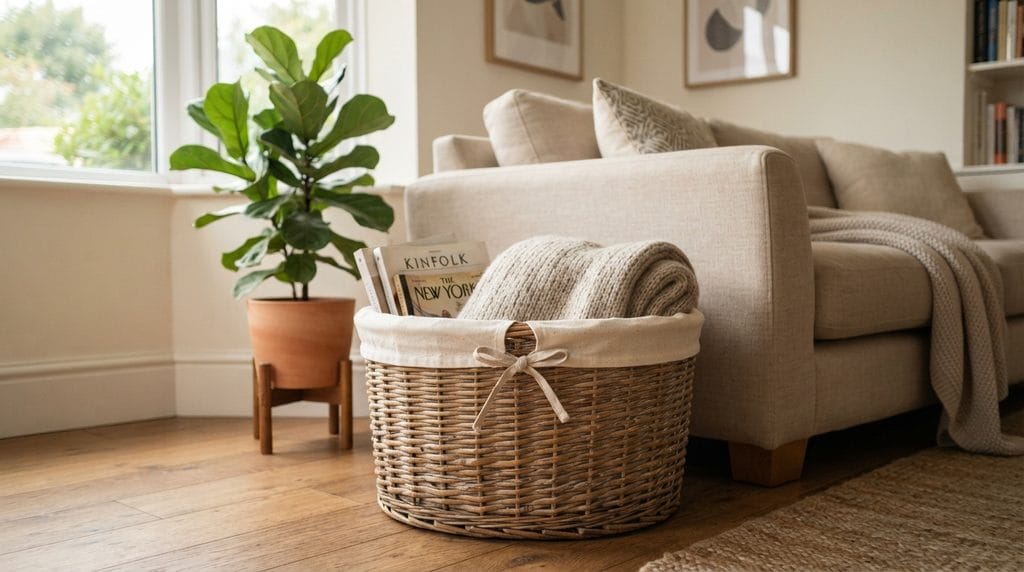
13. Upgraded Woven Basket
With a decorative trim or small fabric liner, a plain woven basket can be a stylish accent piece.
What You’ll Need
- Woven basket
- Neutral fabric
- Ribbon or trim
- Scissors
- Adhesive
Quick How-To
Measure the basket, cut a fabric liner with enough allowance to fold over the rim, and secure it neatly. Keep handles and ventilation openings unobstructed.
Styling Tip
Put blankets, magazines, towels, or children’s belongings in the basket.
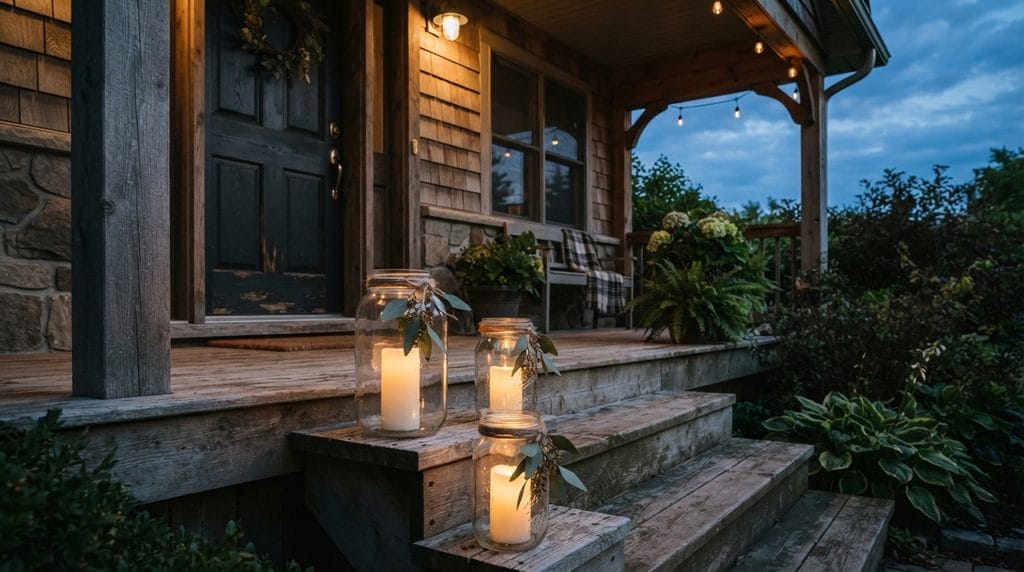
14. Cozy DIY Lantern
When a battery-powered light is combined with a glass container, it can transform into a decorative lantern.
What You’ll Need
- Glass jar
- Battery-operated LED candle
- Twine
- Small decorative greenery
Quick How-To
Place a battery-operated LED candle inside a clean, dry jar and arrange twine or greenery on the outside without covering the light’s switch or battery compartment. Choose a stable spot where the glass cannot be knocked over. Keep loose button or coin batteries inaccessible to children and follow the light manufacturer’s battery safety instructions. Never substitute a real flame in a decorated jar.
Styling Tip
Place multiple lanterns in a cluster around an entrance or on an outdoor covered space.
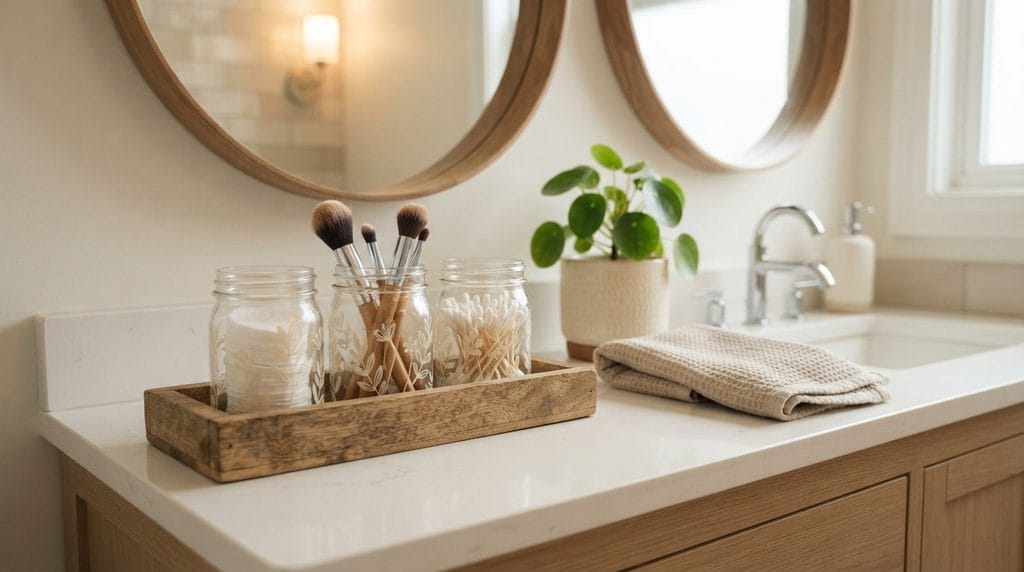
15. Bathroom Countertop Organizer
A shallow tray and a few wipe-clean containers can keep everyday toiletries organised without crowding the bathroom counter. Choose materials suited to a humid room.
What You’ll Need
- Small glass containers
- Wooden tray
- Paint
- Bathroom accessories
Quick How-To
Choose wipe-clean containers that suit a humid room. If you paint any item, use a finish approved for its material and allow it to cure fully before returning it to the bathroom. Group only everyday toiletries on the tray, leave sink controls and outlets accessible, and wipe underneath regularly so moisture does not collect.
Styling Tip
Simplify the color. Cream, white, wood, and soft green tones form a pristine bathroom color scheme.
16. Decorative Architectural Frame
A large second-hand frame can create a focal point on a shelf or console when its proportions suit the space. Secure it against tipping.
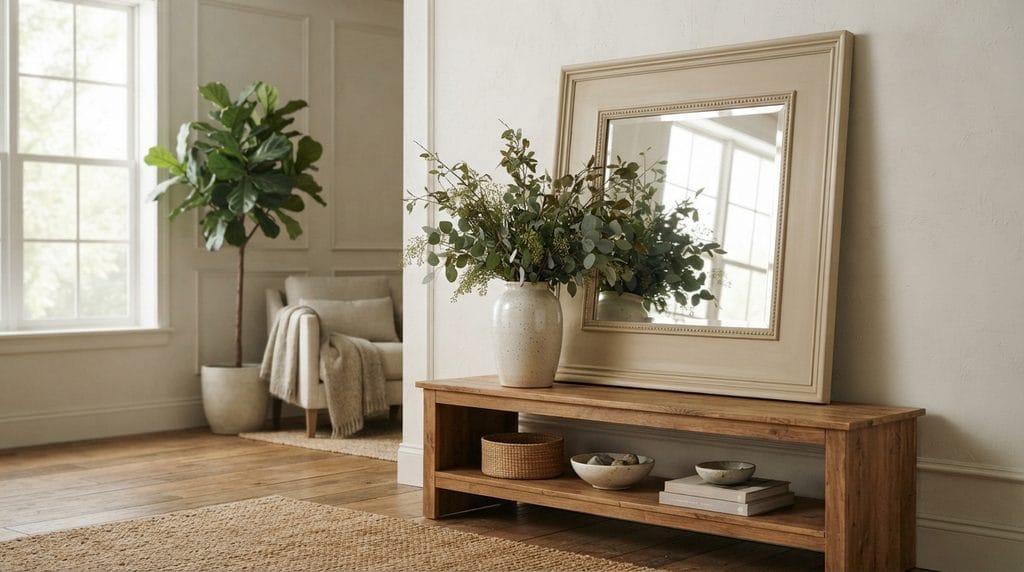
Secure the frame so it cannot tip.
What You’ll Need
- Large, inexpensive frame
- Paint
- Decorative insert
- Paintbrush
Quick How-To
Paint the frame in a warm neutral shade and let it dry fully. Add a lightweight textured insert or mirror panel only if the frame can safely support it.
Styling Tip
Lean a lightweight frame securely at the back of a shelf or console behind a small vase. Keep it away from edges where it could tip; mount heavier frames properly.
17. Dried Flower Centerpiece
Dried flowers can be an affordable source of natural texture and color in your home.
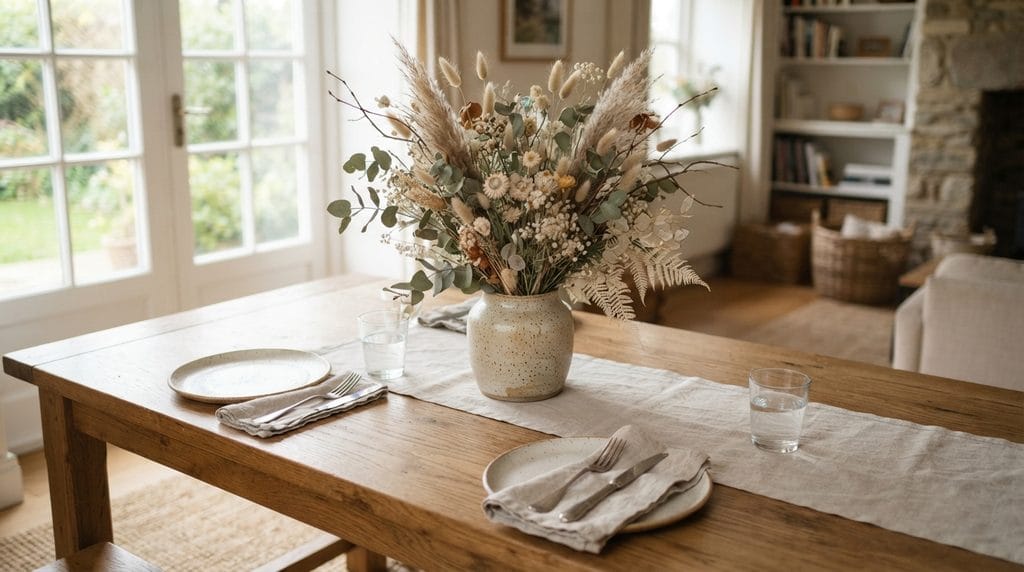
What You’ll Need
- Simple vase
- Dried flowers
- Dried grasses
- Decorative paint
- Optional ribbon
Quick How-To
Place the tallest stems first, then fill in with shorter flowers and grasses, rotating the vase as you work so the arrangement feels balanced from every angle.
Styling Tip
Avoid making the arrangement too symmetrical. A slightly loose, varied shape usually looks more natural.
18. Layered Coffee Table Display
Layering a few affordable accessories is one of the simplest ways to make a room look more polished. For more inspiration on arranging small spaces without creating clutter, see these small-space organization hacks.
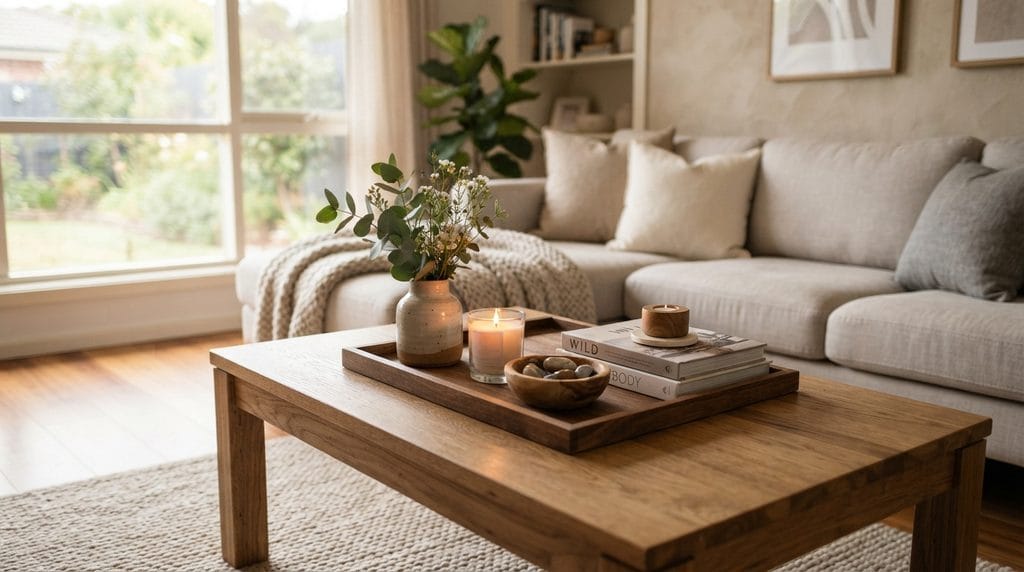
What You’ll Need
- Decorative tray
- Small vase
- Battery-operated LED candle (optional)
- Decorative bowl
- Books
Quick How-To
Start with a tray and one tall focal piece. Add two smaller objects of different heights, then leave clear tabletop for everyday use.
Styling Tip
Play with different textures like ceramic, wood, glass, fabric, and greenery.
19. Seasonal Table Centerpiece
You do not have to spend another fortune on new seasonal decorations to create a beautiful seasonal centerpiece.
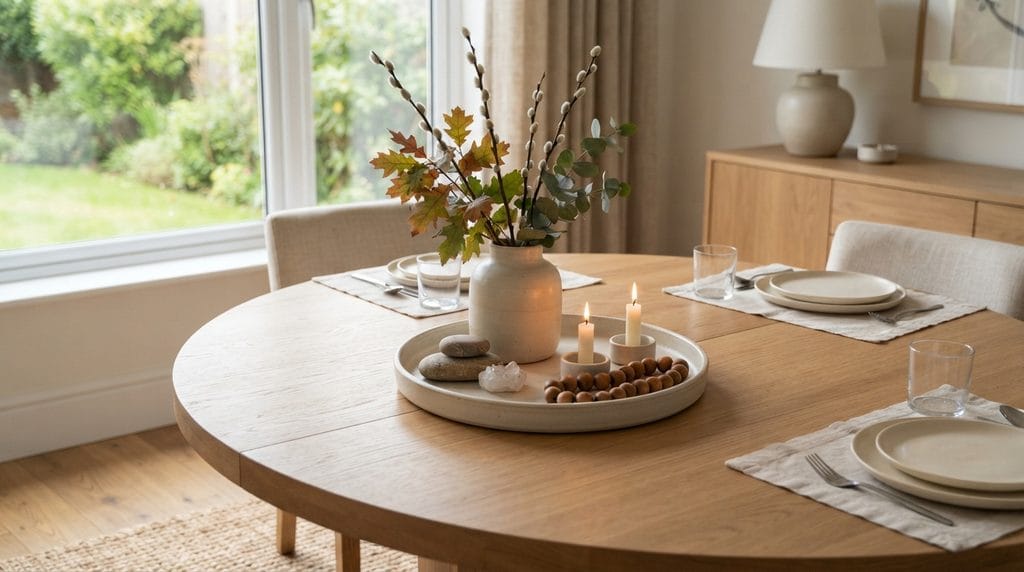
What You’ll Need
- Tray or vase
- Seasonal greenery
- Battery-operated LED tea lights (optional; keep batteries inaccessible to children)
- Decorative branches
- Simple seasonal accents
Quick How-To
Choose a vase of branches or greenery as the focal point, then arrange a few smaller accents around it. Use flameless candles when the display includes dried leaves, fabric, or paper.
Styling Tip
Swap only a few accents with the seasons instead of replacing the whole arrangement. Store reusable pieces together to reduce costs and clutter.
20. High-End-Looking Shelf Arrangement
The final concept is less about creating one piece of art and more about arranging cheaply purchased decorations.
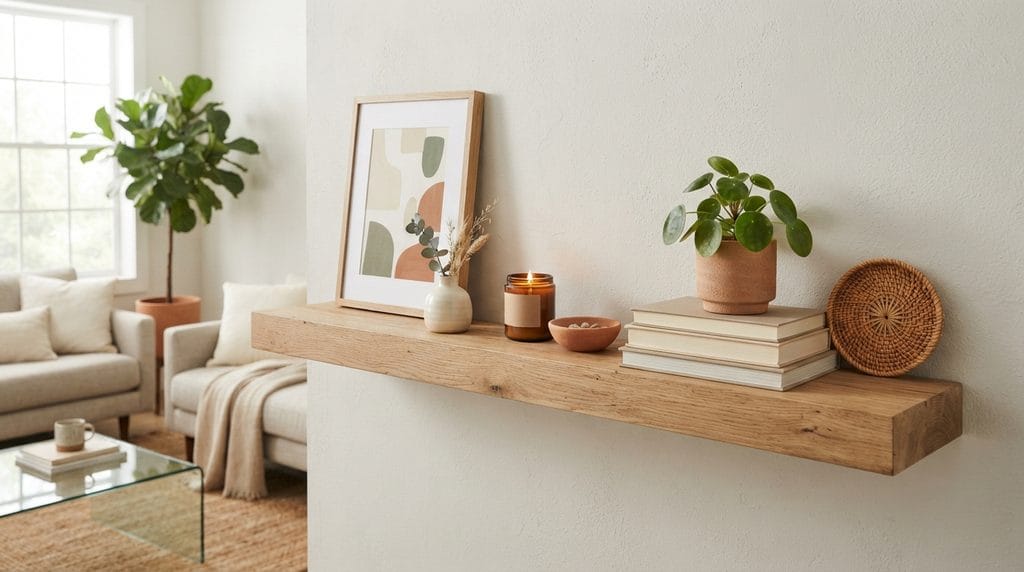
What You’ll Need
- Small vase
- Framed artwork
- Battery-operated LED candle (optional)
- Decorative bowl
- Books
- Small plant
- Woven accessory
Quick How-To
Begin with the largest object, and then add smaller objects at various levels. Allow some space between groups.
Styling Tip
Limit your color palette to cream, beige, natural wood, muted green, and one accent color. This is a quick idea to get inexpensive pieces to appear more unified.
Choose a DIY Project for Your Household’s Needs
Which project should you choose? Match the method to the time, tools and access needs of the people who will use the room. A no-paint shelf restyle can be finished and reversed quickly; a coated jar or planter needs preparation and the full curing time on its product label. A project is not genuinely cheap if it requires several new specialist supplies.
- Limited time or ventilation: Arrange an existing tray, books or baskets instead of using paint, solvents or spray adhesives indoors.
- Reduced grip or mobility: Choose lightweight objects at reachable heights, leave paths and switches clear, and ask for help with heavy mounting rather than relying on a precarious leaning frame.
- Children or pets at home: Prefer stable baskets and unbreakable accents over loose beads, accessible batteries, unsecured glass or dangling cords.
- Rental or shared home: Start with portable displays and removable fabric liners. Check the lease and agree on shared surfaces before drilling or making permanent changes.
Before calling the project finished: Check that doors, drawers and walking routes still work; that finishes have cured; and that the piece can be cleaned without damage. For paint and adhesive work, consult the EPA’s indoor-air guidance alongside the product’s instructions. These are practical selection checks, not guarantees of safety or cost savings.
How to Make Cheap DIY Decor Look More Expensive
The best cheap DIY home decor ideas improve how a space looks or works, not simply how much it costs. Before you begin, follow this six-step styling checklist: choose a color palette, add texture, leave breathing room, vary object heights, use natural materials, and finish every edge neatly.
Choose a Simple Color Palette
Choose two or three main colors and repeat them across small objects. Add one brighter accent sparingly so the room feels coordinated.
Add Texture
Simple materials like wood, rope, woven materials, linen, ceramic, dried flowers, or textured finishes can make inexpensive pieces more substantial.
Avoid Too Much Decor
Leave some open space around each arrangement. You do not need to fill every shelf or cover every surface for a room to feel finished.
Mix Heights
Use high, medium, and short items when arranging on a tray, shelf, or table.
Use Natural Materials
Dried flowers, greenery, wood, glass, and woven materials can add a cozy and classy touch to a cheap room.
Focus on the Finish
A simple project looks better when the edges are neat, the paint is even, and the proportions suit the space. When painting indoors, follow the product label and ventilate the area; the EPA provides guidance on reducing indoor exposure to paint and adhesive fumes. For more affordable project inspiration, explore these DIY home decor ideas for every budget and skill level.
Quick Fixes for Four Common DIY Decor Problems
Why is the paint peeling from a glass jar?
Answer: The surface may be dirty, too smooth for the chosen coating, or handled before the finish cured. Clean and dry the jar, use products specifically labelled for glass and follow the manufacturer’s preparation and curing directions. Keep decorative paint away from food-contact surfaces; a painted jar is not automatically food-safe.
Why does a fabric-covered basket look wrinkled?
Answer: The liner may be cut too loosely or glued before it was fitted. Dry-fit the fabric, fold the excess neatly at corners and secure only after checking that handles and openings still work. Choose a removable liner if you expect to wash it.
Can I use a picture-frame tray to carry drinks?
No. An ordinary picture frame is designed to display a picture, not support the weight or movement of drinks. Treat the frame project as a stationary display for lightweight objects. For serving, choose a tray made and rated for that purpose.
How do I stop a shelf display looking crowded?
Answer: Remove a few objects first, then group what remains by height and purpose. Leave room to reach books, switches and drawers. If the shelf still feels busy, repeat one material or colour rather than adding more decorations.
For a different set of beginner-friendly projects, compare our budget-friendly home decor DIYs. Keep heavier objects stable and out of walking routes, and use flameless lights near fabric, dried plants or paper.
Frequently Asked Questions
What are some cheap DIY home decor ideas?
Painted glass vases, decorative trays, candle holders, planters, wall art, storage baskets, and dried flower arrangements are some easy options.
How can I make cheap decor look expensive?
Limit your color palette, add varying textures, avoid overcrowding, and detail the finishing touches. Neutral tones and natural materials can also lend a more sophisticated look.
What is the easiest DIY home decor project for beginners?
A painted glass jar vase is one of the simplest projects to start with. It reuses an item you may already own, needs only a few supplies, and can be adapted to almost any room.
How can I decorate my home on a small budget?
Start with one visible area, such as a shelf, entryway table, or bedroom corner. Reuse what you own, refresh a few accessories, and buy only supplies needed for your chosen project.
What colors make DIY decor look expensive?
A sophisticated, budget-friendly choice is warm white, cream, beige, natural wood, muted green, soft gray, dusty rose, or subtle terracotta.
How can I make a small room look better without buying new furniture?
Pay attention to the accessories and arrangements. Use cushions and throws and add greenery; make a simple focal point to remove unnecessary clutter. Some thoughtfully designed and executed DIY projects can transform the space without the expense of furnishing.
Final Thoughts and Your Next Step
A good budget DIY project should make your home easier to use as well as nicer to look at. Start with one shelf, entry table or corner; choose the simplest idea that suits your space and materials; then check its stability, cleaning needs and everyday usefulness before starting another project. Reusing what you own and finishing one small project carefully is usually more effective than buying supplies for several unfinished makeovers.
Your one-weekend project plan: On Friday, choose one surface and photograph it. On Saturday, gather supplies you already own and complete one project. On Sunday, let finishes cure, style the result, and remove anything that crowds the space. Save these ideas for your next budget-friendly refresh.