
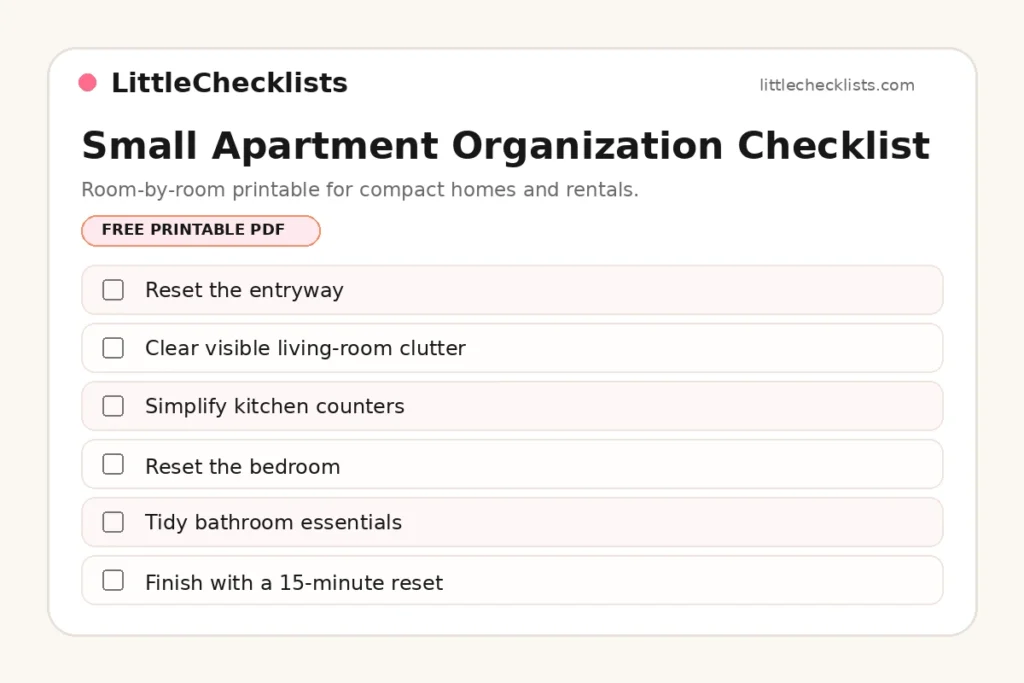
To organize a small apartment, work one room at a time. Clear out what you don’t use, give every daily item one home within easy reach, and use vertical and hidden space before you buy anything new. The free A4 and US Letter PDFs are ready below; jump straight to the downloads or browse the room-by-room checklist first. Each section offers tasks for short sessions, followed by a simple daily reset.
What does small-apartment organization mean? It means arranging limited space so everyday items are easy to find, use, and put away without crowding walkways or work surfaces. The goal is not to fit more possessions into the apartment; it is to make the possessions you keep easier to manage.
You do not need to finish every room in one weekend. Start with the area that causes the most daily friction, set a 20-minute timer, remove rubbish and donations, and assign a home to the items you use every day. Test the new arrangement for a week before buying containers or reorganising another room.
Download the Free Small Apartment Organization Checklist
Prefer to work from paper? Choose A4 for most printers outside North America or US Letter for common US and Canadian paper trays. Both PDFs contain the same room-by-room tasks. Both PDFs are hosted directly on LittleChecklists.com, so you stay on our site instead of being sent to a third-party template service. If a download opens in your browser rather than saving, use your browser’s download or print control. If the PDF is difficult to zoom or navigate, the same room-by-room instructions are available as readable text below.
Printing tip: open the PDF, select portrait and the matching paper size, and check the preview before printing. Start with Actual Size; choose Fit if an edge would be cut off. The checkboxes and labels also work in black and white. The file includes entryway, living area, kitchen, bedroom, bathroom, paper/digital and 15-minute reset sections. You can find more downloads in our free printable checklists library.
Reuse the checklist after the first week
Keep a clean copy of the one-page PDF as a reference. On a working copy, choose three realistic tasks for the week and leave other boxes for later. You can place the sheet in a reusable transparent sleeve and mark it with a suitable wipe-clean pen, or track selected tasks digitally if printing is inconvenient. For a shared household, agree who will handle each communal task before starting. At the end of the week, keep the steps that helped and replace those that were too difficult or unnecessary. If writing on the PDF is inconvenient, choose the relevant tasks from the article text and record them in a notes app, large-print notebook or another format that works for you.
How to Use the Printable in Three Short Passes
The PDF is a menu of tasks, not a demand to tidy every room in one day. Start with the area that causes the most daily friction and tick only the boxes that apply to your home.
- Choose: Print the A4 or US Letter sheet, circle one room and select three tasks that fit your available time and energy.
- Clear and assign: Remove rubbish and donations, then give daily items a reachable home without blocking doors or walkways. Measure what remains before buying containers.
- Test: Try the 15-minute reset for seven days. If a pile returns, move its storage closer to where the item is actually used.
No printer? Open the PDF on your phone, zoom in on the room you need, and copy those tasks into a notes or reminders app. You do not need to print or edit the PDF to follow the plan. For shared homes, divide tasks by responsibility; for accessibility needs, work on one reachable surface at a time. A repeatable routine matters more than a perfectly completed sheet.
Choose a 5-, 15- or 30-Minute Starting Point
Short on time? Pick one manageable session rather than tackling the whole apartment. For a 5-minute reset, clear the entry and return shoes and keys to their places. In 15 minutes, empty one busy surface, discard rubbish, and assign homes to what stays. With 30 minutes, sort one drawer into keep, relocate and donate, then measure the remaining items before buying organizers. For a studio, prioritize a surface used for several activities; for a shared home, agree where communal items belong. Stop when the timer ends and repeat tomorrow. If five minutes is still too much, return just one item to its place or clear a single reachable surface. A smaller repeatable task is more useful than a schedule that causes pain, fatigue or unnecessary stress.
Room-by-Room Small Apartment Organization Checklist
Entryway Checklist
The entry sets the tone for the whole home. In many apartments it’s just a strip of wall by the door, so every inch needs to earn its place.
- Use hooks at comfortable heights for adults and children, checking each hook’s stated load limit and the fixing recommended for your wall. Keep coats, shoes and bags clear of the entrance door and your exit route; renters can use appropriately rated over-door hooks for light items where suitable.
- Keep only regularly worn shoes at the entrance. Put occasional pairs in an existing wardrobe, under-bed box or another dry storage spot that does not obstruct the exit.
- Add a small tray or wall pocket for keys, mail, and sunglasses.
- Sort mail when it arrives. Recycle junk right away and put anything that needs action in one folder.
- If you’re in a studio with no real entry, mark a “landing zone” with a hook rail, a slim shoe cabinet, and a non-slip mat only where it will not obstruct the entrance.
If your flat has no coat cupboard or foyer, see our small apartment entryway ideas with no closet for practical no-drill storage, layouts and a quick safety checklist.
Living Room Checklist
In small apartments, the living room often doubles as an office, dining area, and play zone. Aim for clear surfaces and storage that closes.
- Clear the coffee table completely, then put back only what you use daily.
- Choose furniture that stores things, like a lidded ottoman, a bench with baskets, or a console with doors. Check that lids cannot fall shut on fingers, and do not use a storage chest as seating unless the manufacturer rates it for that purpose.
- Keep remotes and unplugged cables in a labelled caddy. Charge phones and other devices on a stable, ventilated surface rather than burying powered equipment inside a closed storage box.
- Give work or hobby supplies a single bin you can put away at night. For example, store a laptop charger, notebook, and pens together so a dining table can switch back to mealtime quickly.
- Use correctly installed wall shelves for books and display pieces where permitted, and keep heavy items on lower shelves. In rentals where drilling is restricted, use low, stable storage instead; tall bookcases and dressers still need suitable anti-tip anchoring, especially around children.
For more renter-friendly ideas, browse these small space organization hacks.
Kitchen Checklist
Small kitchens clutter up fastest because counters attract everything. Treat your counter space as prime real estate.
- Keep frequently used appliances on the counter only when there is enough clear food-preparation space and the appliance’s ventilation and electrical clearances can be maintained. Store less-used appliances in an accessible location rather than crowding outlets or placing them near the sink.
- Group items by task, such as a baking bin, a breakfast zone, and a lunch-packing shelf.
- Use stable riser shelves only where cabinet height and the manufacturer’s load limit allow. Keep heavier dishes on the lowest shelf and check that the doors still close easily.
- Use lightweight adhesive hooks or lid organizers on cabinet doors only after checking hinge clearance, surface suitability and the product’s weight limit. Avoid overloading a door until it pulls out of alignment.
- Before shopping, check pantry duplicates, damaged packaging and how food has been stored. A “Best if Used By” date usually describes quality, not an automatic safety cutoff; see the USDA food-date guidance. Follow storage instructions, discard food that is spoiled or unsafe, and never use infant formula past its use-by date.
If coffee gear keeps taking over the counter, a dedicated station can help. These coffee corner ideas for small spaces show compact setups that work well.
Bedroom Checklist
A bedroom should feel restful. Aim to have fewer things out in view rather than simply adding more storage.
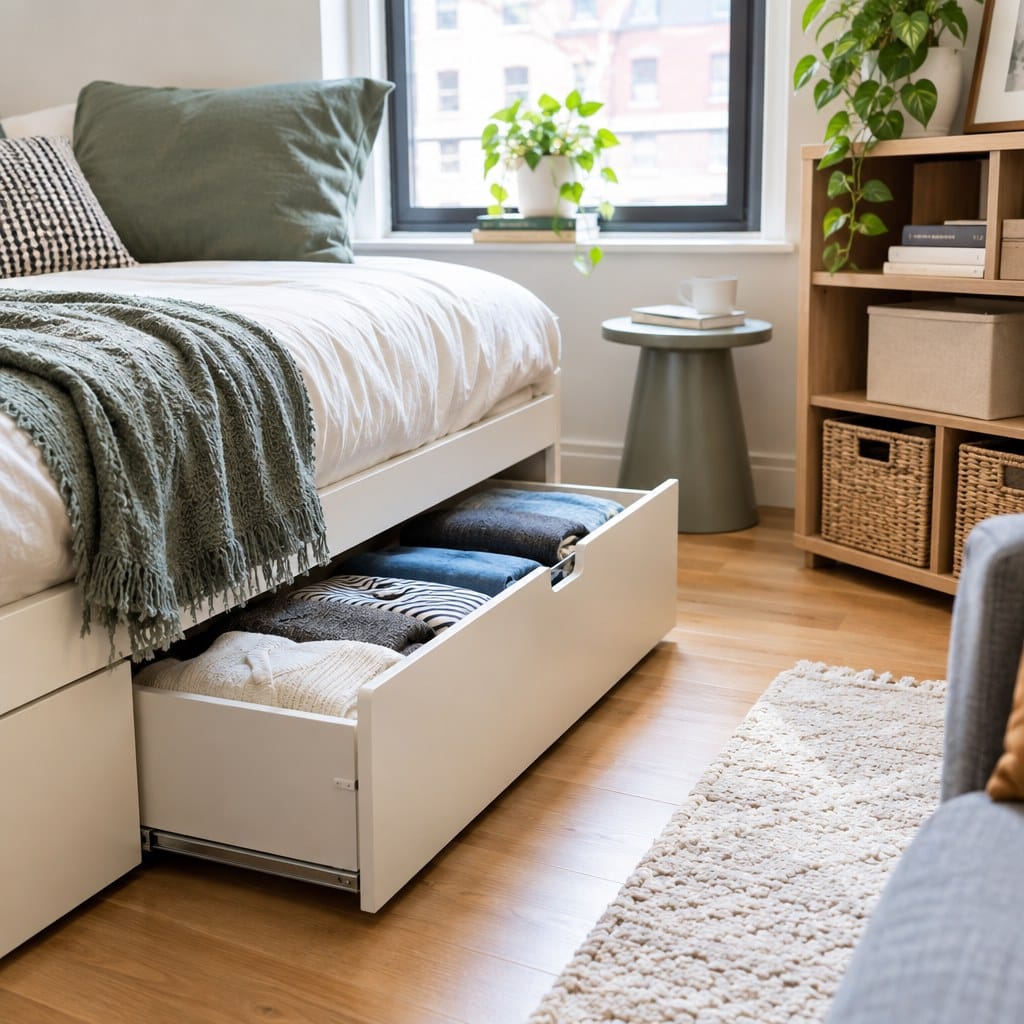
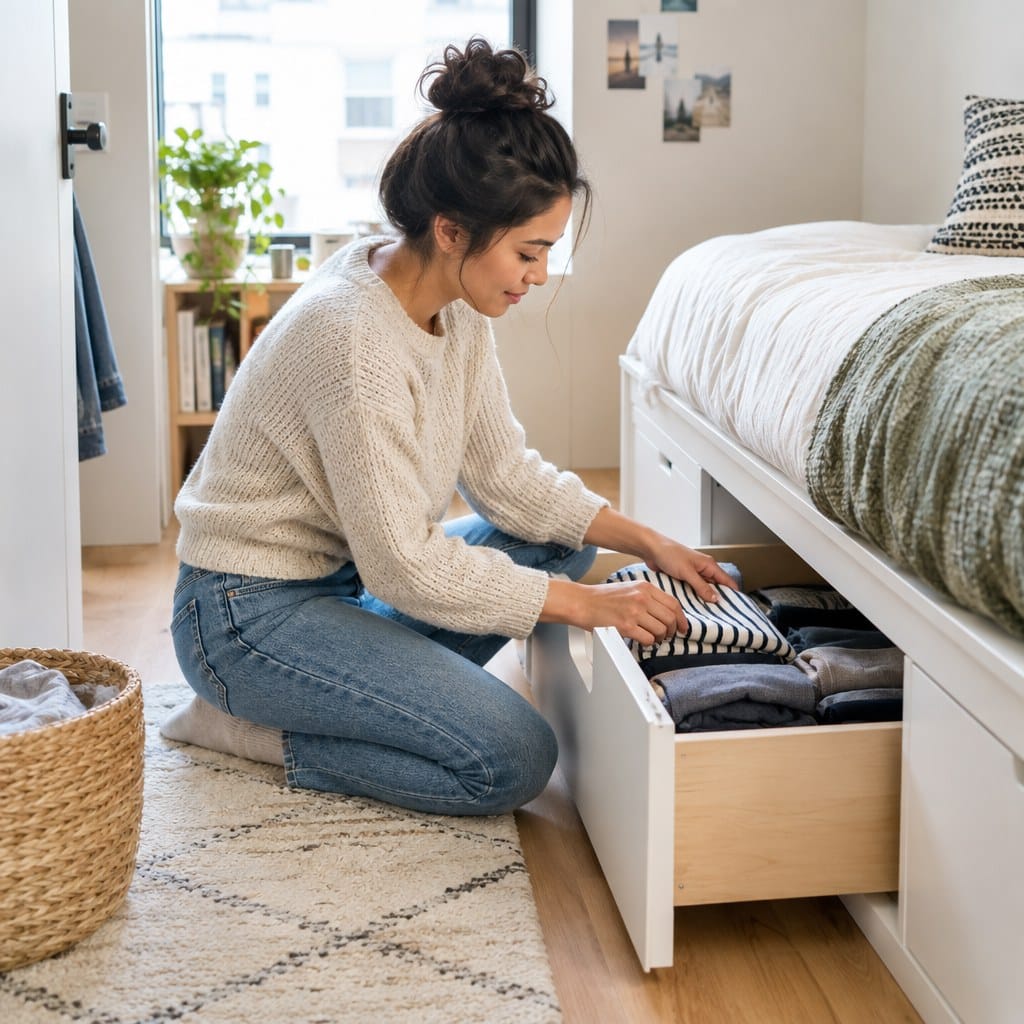
- Use the space under the bed for off-season clothes and spare bedding in lidded containers, provided the area is dry and easy to access. Check for dampness before storing fabrics, and choose lighter containers or another reachable shelf if bending and lifting are difficult.
- Review clothes you rarely wear, including seasonal items, and fold or hang the rest the same way each time.
- Keep the nightstand to a lamp, a book, and a charger.
- Add a hook or valet stand for “worn once” clothes that usually end up on a chair.
- Consider a second wardrobe rail only if the unit and fittings are designed to support the added weight. Measure the longest garments first so they will not drag, and leave frequently worn clothes within easy reach.
Layout matters as much as storage. These small bedroom layout ideas show how furniture placement can make the room feel bigger. These bedroom ideas for renters offer ways to personalize the room without damaging walls.
Bathroom Checklist
Bathrooms need storage that stays usable in a damp environment. Start by removing duplicates and expired products, then choose wipe-clean, moisture-suitable containers instead of crowding the sink or floor.
- Separate expired medicines, old makeup and nearly empty bottles. Keep medicines securely away from children while sorting; in the US, the FDA recommends a drug take-back option for most unused medicines. Elsewhere, follow your pharmacist’s or local health authority’s instructions rather than flushing medicines routinely.
- Use a stable, appropriately secured over-toilet shelf or suitably rated door hooks for towels. Check moisture resistance, door clearance and the manufacturer’s fixing instructions; avoid placing heavy items where they could fall onto someone.
- Give each person a small caddy for daily toiletries. Place everyday items at a comfortable reach height; avoid floor-level baskets that become tripping hazards, and leave enough space for the bathroom door to open fully.
- If space is tight, keep backup supplies like toilet paper and soap refills in one bin in another room.
- Add drawer dividers so small items don’t drift around.
Shared and Family Storage Checklist
Shared items cause the most friction in small homes, so everyone needs to know where things live.
- Keep tape, basic tools and spare bulbs together in a labelled utility box, but store loose batteries—especially button or coin batteries—securely out of children’s reach, with terminals protected as directed by the manufacturer.
- Label bins clearly, and use picture labels for young children. Keep unsuitable small objects in a separate secure location rather than mixing them with children’s everyday storage.
- Give each person one bin or shelf for personal odds and ends.
- Rotate toys. Keep some out, store the rest, and swap them every few weeks.
- Keep a donation bag in a closet so outgrown items leave the house easily. Give children’s school supplies one labeled caddy and a predictable return spot.
Paper and Digital Clutter Checklist
The printable includes a paper-and-digital section because clutter is not limited to shelves and countertops. Use these specific actions to make that section practical without buying a filing cabinet or extra storage.
- Incoming mail: Sort it into act, file and recycle. Keep time-sensitive papers in one action folder, not across several surfaces.
- Receipts and warranties: Keep documents you genuinely need in a labelled envelope or secure digital folder. Check local record-retention rules before discarding legal or financial paperwork.
- School and family forms: Give current forms one return spot and archive or recycle outdated handouts.
- Downloads and screenshots: Back up important files first, then delete verified duplicates and file useful items under clear names. Keep sensitive documents in a private, appropriately secured location rather than a shared or unsecured account.
- Shared devices: Make necessary household documents findable without exposing private information or passwords. Use access-controlled folders for sensitive scans and sign out of shared devices after accessing private accounts.
- Weekly reset: Spend five minutes clearing the action folder and downloads, then choose the next three priorities.
If the amount to sort is larger than one session, use our whole-home declutter checklist to spread the work across several days. Keep private paperwork secure while sorting and dispose of it appropriately.
Which Small-Apartment Setup Fits Your Household?
Use the same room-by-room checklist differently depending on who shares the space. Start with the daily bottleneck, not the room that looks most attractive in photographs.
Studio apartment: make one room change jobs easily
Keep one portable work caddy, one closed basket for hobby supplies and a clear place to put them after use. For example, before dinner, return the laptop and stationery to the caddy, fold away the work surface if needed and leave the walking route to the door open. If you cannot reset the room in a few minutes, reduce what stays in the shared area.
Shared apartment: agree on communal zones
Give each person a clearly labelled shelf or bin, then agree on one shared drop zone for keys and deliveries. Put cleaning supplies where everyone can reach them safely and assign a simple weekly reset for the kitchen and bathroom. Avoid buying a large communal organizer until housemates agree what belongs inside it.
Family apartment: prioritize safe reach and easy returns
Place everyday children’s items in low, easy-to-reach containers while keeping medicines, batteries, sharp objects and cleaning products securely out of reach. Use picture labels for toy categories and return one group before opening another. Tall furniture still needs suitable anti-tip anchoring; a removable hook is not an alternative.
Before You Buy Storage
It’s tempting to start with a shopping trip, but new containers often just hide clutter.
- Declutter first. Then measure the space and the items that are left.
- Reuse sturdy shoeboxes and baskets for dry, lightweight items before buying containers. Avoid fragile glass jars where children or pets could knock them over.
- Choose sturdy containers that fit the measured shelf depth and are easy to open; matching colors are optional.
- Check your lease before drilling. Removable hooks and tension rods can hold suitable lightweight items when used as directed, but they do not replace proper anchoring for tall furniture. The U.S. Consumer Product Safety Commission’s Anchor It! program provides furniture tip-over prevention guidance.
- Buy for the item, not the look. Measure shelf depth, container height, and door clearance first; a pretty basket that blocks a drawer or does not fit is wasted space.
Choose the Right Storage Fix
Match the organizer to the actual problem before spending money. Use this quick decision guide to choose the least complicated fix, then test it for seven days before buying anything larger.
| Clutter problem | Try first | Check before buying |
|---|---|---|
| Shoes at the door | Limit pairs to everyday use and add one tray | Door swing and clear walking route |
| Busy kitchen counter | Move occasional appliances to an accessible shelf | Safe food-prep area and appliance clearances |
| Clothes on a chair | Use a worn-once hook or small basket | Available wall/door space and load rating |
| Mixed work and dining supplies | Assign one portable activity caddy | Whether it can be put away in under two minutes |
| Overflowing cabinet | Remove duplicates before adding a shelf riser | Usable depth, height and door clearance |
| Storage is difficult to reach | Move everyday items to a comfortable-height shelf or portable caddy | Reach, grip, weight and a clear route for mobility aids |
Two real-life storage decisions
Example 1 — a narrow entry: If shoes block the door, first move occasional pairs to bedroom storage. Keep one small tray for daily shoes and check that the door opens fully. Only consider a slim rack after measuring its depth and confirming that it will not obstruct your exit.
Example 2 — a desk that is also a dining table: Put the charger, notebook and pens in one portable caddy. At mealtime, move the caddy to a designated shelf. If it takes longer than two minutes, remove rarely used supplies from the caddy rather than buying another organizer.
The 15-Minute Daily Reset Checklist
Set a timer each evening and work through this list:
- Minutes 1–5: Return stray items to their homes, starting with the living room.
- Minutes 6–9: Clear one kitchen work surface and wash, stack or load the dishes, depending on your setup.
- Minutes 10–12: Hang coats, line up shoes, and sort the day’s mail.
- Minutes 13–15: Return shared items to their places and set out one thing you need tomorrow. Prioritize essentials over cosmetic tidying.
A Seven-Day Small-Apartment Organization Plan
You can spread the work over a week instead of attempting a full apartment makeover. Each day’s task can be shortened or divided between household members.
- Day 1 — Identify friction: Photograph or note the two spots where things pile up, and choose one to tackle first.
- Day 2 — Entryway: Remove extra shoes and bags, then set up one reliable place for keys.
- Day 3 — Kitchen: Clear one counter section, discard expired food appropriately and group everyday tools by task.
- Day 4 — Living area: Put remotes and chargers in one container and test how quickly the room changes between activities.
- Day 5 — Bedroom and bathroom: Free the nightstand and one bathroom drawer; securely store medicines and sharp items.
- Day 6 — Shared storage: Label common bins and ask everyone whether the locations are practical.
- Day 7 — Test and adjust: Try the 15-minute reset, check walkways and note what still gets left out. Change the item’s home before buying another container.
For a studio or a household with limited time, do just Days 1–3 this week. A smaller routine that survives a busy day is more useful than an ambitious plan nobody can maintain. The plan does not require new storage purchases: complete a week using the shelves, baskets and containers you already own, then decide whether a measured gap actually remains.
Small Apartment Organization FAQ
Where should I start when my small apartment feels overwhelming?
Start with the room or surface that causes the most daily friction, such as the entryway, kitchen counter, or bedroom floor. Remove obvious trash and donations first, then give the remaining everyday items a specific home before buying organizers.
How can I organize a small apartment without buying more storage?
Declutter first, reuse containers you already own, move rarely used items out of prime-access areas, and use existing vertical or under-bed space. New storage is most useful only after you know exactly what needs to fit.
What storage works best in a rental apartment?
Start with under-bed boxes, baskets, portable caddies and suitably rated over-door organizers. Check the lease, door clearance and product instructions before attaching anything. Removable hooks are for suitable light loads—not a substitute for securing tall, tip-prone furniture; ask your landlord about safe anchoring if needed.
Can I use this checklist without a printer?
Yes. Open either PDF on your phone or computer, and copy the tasks for one room into your notes or reminders app. Printing is optional.
How often should I reset a small apartment?
A short daily reset is usually easier than waiting for clutter to build. Use the 15-minute routine above to return items, clear counters, reset the entry, and prepare for the next day.
Why Does a Small Apartment Get Cluttered Again?
If a new storage system fails after a few days, the problem may be the location, the number of items or the effort required to put things away. Test the simplest adjustment first.
Things pile up beside the storage bin
Move the bin closer to where the item is actually used. For example, a key tray beside the door is more practical than a drawer across the room.
Containers are full immediately
Sort duplicates and items you no longer use before adding more storage. Keep a small donation bag available, but store it away from exits.
One household member cannot use the system
Check reach, grip, height and labelling. A low basket or picture label may work better than a high shelf. Adapt storage to the people using it, including children and anyone with mobility or sensory needs.
The room still feels cramped
Check door swings, chair pull-out space and walking routes. A narrow cabinet is not a good purchase if it makes the room harder to move through. The U.S. Fire Administration’s escape-planning advice reinforces the importance of keeping exits unobstructed.
Summary and Next Step
A small apartment works better when everyday items have clear homes, walking routes stay open and surfaces can be reset quickly. Your next step: choose one trouble spot, complete its checklist in a 20-minute session and take a quick before photo. Use the 15-minute reset tonight, then review the same spot after seven days. If clutter returns, adjust the storage location or reduce the number of items before buying another organizer. For a fresh copy, return to the A4 and US Letter downloads.
Ready for More Small-Space Ideas?
Browse Small Space HacksFor a flexible day-to-day planning sheet, use our free daily checklist template with priorities, tasks, reminders and notes.