
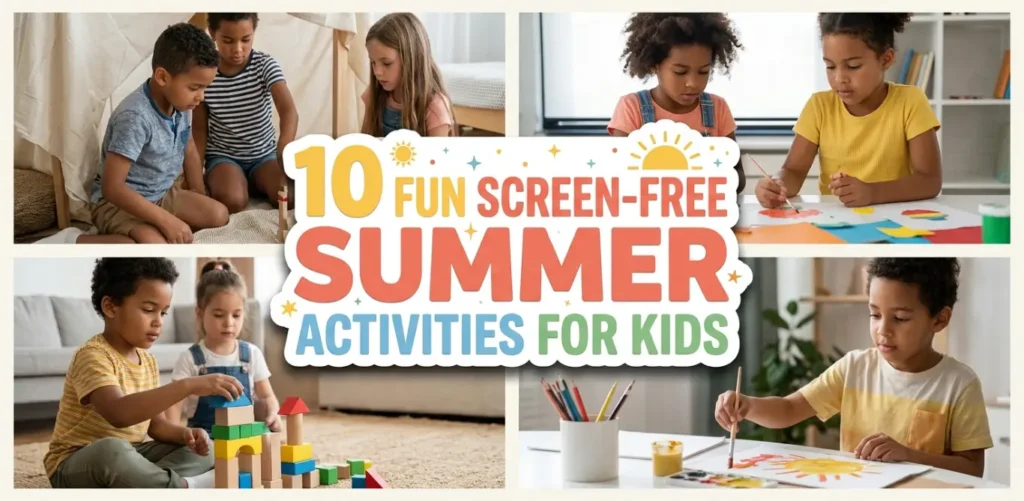
Screen-free summer activities give families simple ways to replace some passive screen time with active play, creativity, and hands-on learning. Choose according to your child’s age, communication and movement needs, the weather, and the space available. Each idea below includes a simple way to begin; one enjoyable activity is enough, and most use everyday supplies.
Quick takeaway: For high-energy kids, start with a treasure hunt or obstacle course. When it is too hot to play outside, set up ice painting at a cool indoor table or try cup stacking. For quieter time, choose shadow drawing, a sticker storybook, rock painting, or a mini garden. For school-age children, active ideas can also contribute toward the CDC recommendation of at least 60 minutes of daily physical activity for ages 6–17; children ages 3–5 should be active throughout the day.
Quick Chooser: Pick an Activity for the Moment
- Need to burn energy? Choose the backyard treasure hunt or DIY obstacle course.
- Need a cool activity on a hot day? Set up ice painting at a cool indoor table or choose cup stacking.
- Want quiet creative time? Pick shadow drawing, a sticker storybook, or rock painting.
- Want a hands-on project? Build a cardboard city or plant a mini garden.
- Only have a few minutes? Try the cup stacking challenge.
Why Screen-Free Summer Play Matters
Screen-free play makes space for movement, creativity and shared problem-solving. It need not replace every useful screen experience: the American Academy of Pediatrics’ 2026 media guidance encourages families to consider the child, content, context and the activities digital media may displace. A short, enjoyable offline activity is a practical option, not a test of good parenting.
Five-minute setup: Choose one idea, check materials for age suitability, clear a safe play area, explain the first step, and begin together. Keep the activity short and flexible.
Quick Comparison: Time, Space and Energy
| Activity | Approx. setup | Where it works | Safety / cleanup check |
|---|---|---|---|
| Treasure hunt | 5–10 min | Yard or one indoor room | Check hiding spots; use large objects for younger kids |
| Ice painting | 5–10 min plus freezing | Shaded patio or washable table | Adult prepares ice; supervise sticks and spills |
| Chalk letter match | 2–5 min | Pavement or tabletop cards | Use large cards; avoid balloon pieces |
| Obstacle course | 5–15 min | Clear yard or spacious room | Use low, stable stations; no risky jumps |
| Cardboard city | 5–10 min | Table or floor mat | Adult handles cutting tools |
| Mini garden | 10–20 min | Balcony, windowsill or yard | Choose non-toxic plants; wash hands after soil |
| Cup stacking | 1–3 min | Small table | Use sturdy age-appropriate cups |
| Shadow drawing | 2–5 min | Sunny spot or lamp-lit table | Keep lamps and cords safely positioned |
| Sticker storybook | 2–5 min | Table or tray | Use age-appropriate stickers; watch small parts |
| Rock painting | 5–10 min | Protected craft surface | Use clean large stones and washable supplies |
Choose Activities by Age, Space and Support Needs
For preschoolers, try picture-clue hunts, large-cup stacking or sticker stories with an adult. Primary-school children may enjoy cardboard cities, shadow drawing or mini gardening. Older children can design longer treasure hunts or more challenging obstacle courses. For a small home or a child who needs quieter or seated play, use tabletop cup patterns, larger materials and short sessions. These are flexible ideas, not safety guarantees: check age labels, supervise tools and small parts, and adapt to each child’s abilities.
10 Easy Screen-Free Summer Activities for Kids
1. Backyard Treasure Hunt
A backyard treasure hunt turns outdoor play into a simple search-and-discover game. Hide a few large toys or picture cards in reachable places, then give children a map or age-appropriate clues to follow. Avoid hiding food where pets or very young children might find it. It keeps kids moving while encouraging observation and problem-solving.
Try it: Hide three to five large, age-appropriate objects in safe, reachable spots. Give younger children picture clues and older children short written riddles. After the first round, invite your child to hide one object and explain the clue they designed. For an indoor version, keep every clue in one room and avoid stairs, cupboards with hazards, or places near water.
What You Need
- Large toys or picture cards suitable for the youngest child present
- Paper clue cards or treasure map
- Basket or small treasure box
- Tape or markers
Make it easier: For younger children, use picture clues and keep the search in one safe room. For older children, let them design the map and take turns leading the hunt.
2. DIY Ice Painting
DIY ice painting uses frozen colored water as a paintbrush. Freeze water with food coloring and add popsicle sticks as handles, then let children glide the melting cubes across sturdy paper or cardboard. It is a simple way to explore colour and texture at a cool indoor table when outdoor heat makes play uncomfortable.
Try it: An adult can prepare coloured ice in advance using an ice tray and a small amount of food colouring. Set a sheet of thick paper on a washable tray, let children move the ice to make overlapping colours, and ask what changes as it melts. Supervise closely, especially if a child might mouth ice or loose sticks; for younger children, offer a brush with coloured water instead. Wipe spills promptly to prevent slips.
What You Need
- Ice tray
- Food coloring
- Popsicle sticks
- White paper or cardboard
- Small bowls or tray
3. Chalk Letter Match Without Balloons
Draw four uppercase letters and their lowercase partners on large reusable cards or in washable chalk circles. Call out a letter, then ask your child to step toward or point to its match. For indoor or seated play, spread large cards across a table, let children point to a match, and take turns calling out letters. Cards and chalk are preferable to balloons, which can pose a choking or suffocation hazard; the U.S. Consumer Product Safety Commission warns about uninflated and broken balloons. Use age-appropriate materials and supervise the activity.
What You Need
- Large letter cards or washable outdoor chalk (recommended)
- Washable markers for reusable cards
- Flat tray for tabletop matching (optional)
- Alphabet flashcards (optional)
- Outdoor play area
4. DIY Obstacle Course
A DIY obstacle course can turn your yard into a fun adventure playground. Using simple household items, children can step over low tape lines, weave around cups, and aim soft beanbags at a target without needing climbing equipment. It is an active way to practise coordination and balance while enjoying time outdoors.
Try it: Set out three stations in order: step over a tape line, weave around cups, then toss a soft beanbag into a basket. Keep stations low and stable with room to move safely. Demonstrate the route and let your child adjust the difficulty at their own pace. For seated or low-mobility play, move the stations to a table and replace stepping with pointing, reaching or a soft toss.
What You Need
- Plastic cups or cones for weaving
- Painter’s tape for a flat step-over line (check the floor finish first)
- A soft beanbag or rolled-up socks for tossing
- A stable basket or box for the toss target
- Clear indoor floor space or a safe, level yard
5. DIY Cardboard City
Use cardboard boxes, markers, and tape to build roads, houses, tunnels, shops, or garages. Children can plan the layout, decorate the buildings, and then use toy cars or figures for pretend play, combining construction, problem-solving, and storytelling in one screen-free project.
Try it: Begin with two boxes for buildings and a strip of paper for a road. Let an adult handle any cutting; children can add signs and a bridge, then invent a story about who lives in the city. In a small apartment, build on a tray or mat and keep a box for packing the pieces away. Replace small toy figures with large paper characters when younger children are present.
What You Need
- Cardboard boxes
- Markers or paint
- Tape and scissors
- Toy cars or dolls
- Stickers for decoration
6. DIY Mini Garden Planting
Planting a mini garden gives children a simple project they can revisit throughout the summer. Let them decorate a pot, add soil, plant an age-appropriate flower or herb, and help with watering. The routine adds hands-on nature time while giving children a small responsibility they can observe over several weeks.
Try it: Begin with one stable pot, a child-appropriate scoop and a seed or non-toxic plant suited to your light conditions. Let the child label the pot, water only as needed for that plant, and draw what changes during a twice-weekly check. A windowsill works when outdoor space is unavailable. Check that the chosen plant suits the home and follow the product instructions for soil and tools. Place a drip tray under indoor pots and wash hands after gardening.
What You Need
- Small flower pots
- Soil
- Seeds or small plants
- Watering can
- Small gardening tools
Make it accessible: Use one stable pot on a table, a small scoop and a lightweight watering cup. Choose non-toxic plants and wash hands after handling soil.
7. DIY Cup Stacking Challenge
The cup stacking challenge is a quick indoor or outdoor game. Start with a three-cup pyramid, let your child copy it, then try a six-cup pattern and practise taking it down. Use a timer only if the child enjoys it; otherwise take turns inventing patterns, describe each shape, or use larger cups for easier handling. Lightweight cups and a clear tabletop keep setup easy. Try it: Show a three-cup triangle, ask your child to copy it, then let them invent a pattern for you to build. If stacking is frustrating, arrange the cups by colour or size instead; the goal is shared play, not speed.
What You Need
- Plastic cups
- Table or floor space
- Timer (optional)
- Score sheet (optional)
8. DIY Shadow Drawing
For shadow drawing, place a toy, plant, or other safe object in sunlight so its shadow falls across paper, then trace the outline and decorate it. Try the same object at different times of day to notice how the shadow changes, turning a quiet art activity into a simple observation exercise.
Try it: Put a toy beside paper in indirect or comfortable sunlight and trace its shadow. Return later, mark the new outline in another colour, and compare the direction and length of the two shapes. For indoor play, use a cool LED torch held by an adult; keep cords out of walkways and never aim the light at eyes. If tracing is difficult, let the child point out where the shadow moved while someone else draws. For children who prefer a tactile version, place a large cardboard shape on paper and trace around its edge together at a comfortable indoor table.
What You Need
- Paper sheets
- Pencils or markers
- Small toys or plants
- Outdoor sunny space
Indoor alternative: If sunlight or outdoor space is unavailable, shine a cool LED torch toward a safe object and trace the shadow on paper. Avoid shining light into anyone’s eyes.
9. DIY Sticker Storybook
Give children a few sheets of paper or a blank notebook and let stickers become story prompts. They can arrange characters and objects first, then add drawings, speech bubbles, or simple sentences. Pre-writers can tell the story aloud while an adult writes down their words.
Try it: Pick one character sticker, one setting and one surprise. Use three pages for the beginning, middle and end; invite the child to describe what the character wants, what goes wrong and how the story finishes. Pre-writers can dictate while an adult writes their words. For children who may mouth small stickers, use large drawings or reusable picture cards instead. A child who does not enjoy sticky textures can arrange the cards and tell the story aloud while someone else records it.
What You Need
- Blank notebook or paper
- Stickers
- Crayons or markers
- Glue stick
- Colored pencils
10. DIY Rock Painting
Wash and dry smooth stones, then let children decorate them with simple patterns, animals, flowers, faces, or story characters. Painted rocks can become garden decorations, story props, or small gifts. Choose child-appropriate art materials and supervise according to the product instructions.
Try it: Decorate two large, clean, dry stones with age-appropriate, non-toxic supplies, allow them to dry according to the paint label, and use them to tell a short story. For children who might mouth small objects, use cardboard shapes instead.
What You Need
- Smooth rocks or stones
- Age-labelled, washable craft paint suitable for the child’s age
- Paint brushes
- Water cup
- Paper towels
Low-mess alternative: Decorate large, clean stones with washable paint pens on a tray, or draw rock shapes on cardboard if suitable stones are unavailable. Keep small stones away from young children.
How to Make Screen-Free Summer Activities Easier to Use
Choose one activity that fits the weather, your available space, your child’s age, and their energy level instead of trying to plan a full day at once. Gather materials before you begin, offer two or three choices, and let children adapt the activity. For outdoor projects, use age-appropriate supervision and check product labels for scissors, paints, small parts, and balloons.
- For active play: try the treasure hunt, obstacle course, or chalk letter match.
- For quieter creative time: try ice painting, shadow drawing, sticker storybooks, or rock painting.
- For hands-on learning: try mini gardening, cardboard city building, or letter matching.
If bad weather keeps everyone indoors, these indoor activities for kids give you more screen-free options. For children who want to plan and manage their own projects, try these age-appropriate independence-building ideas. You can also build these activities into everyday routines with these daily learning habits for kids. If transitions away from screens are difficult, these positive parenting techniques offer calm, consistent ways to give choices and set boundaries.
Three Ready-to-Use Screen-Free Summer Activity Plans
These short play sessions combine two activities from the list so parents can start without planning a full day. Times are flexible estimates, not goals. Choose a plan for the weather and your child’s needs, then stop or switch whenever play is no longer enjoyable.
Hot afternoon: 20-minute indoor craft and building session
Materials: large plastic cups, paper, stickers and a shallow tray. Steps: (1) Spend five minutes stacking cups into a tower or pattern. (2) Invite your child to create a sticker story on paper for ten minutes. (3) Use the last five minutes to retell the story and tidy together. Adapt: For younger children, use large age-appropriate supplies; for children who dislike sticky textures, offer crayons instead. Keep small stickers away from children who might put them in their mouths.
Cool morning: 25-minute backyard explorer session
Materials: three to five picture or word clues, a basket, paper and a pencil. Steps: (1) Hide clues in safe, easy-to-reach places before the game. (2) Follow the treasure hunt for about ten minutes. (3) Spend ten minutes sketching a plant, leaf or shadow found along the way. (4) Finish with a water break and let your child design one clue for next time. Adapt: Keep the route flat and close to home for younger children or limited mobility. Move indoors when heat, air quality or weather makes outdoor play unsuitable.
Rainy day or small apartment: 15-minute tabletop city
Materials: two small cardboard boxes, paper, washable markers and tape. Steps: (1) Turn boxes into buildings and draw one road. (2) Let children add signs or characters. (3) Take turns telling a short story about a visit to the city. Adapt: An older child can design a map while a younger child decorates a large cardboard building. Adults handle cutting; keep tape, small objects and sharp tools appropriate to the youngest child present.
How to Move from Screens to Summer Play
Give a short warning before a planned screen-time transition, then offer two real choices: “When this episode ends, would you like the cup game or a treasure hunt?” Prepare the first materials together and demonstrate one easy step. If your child resists, acknowledge the feeling while keeping the agreed boundary: “You wanted more time. The screen is finished for now; I can help you start.” A five-minute trial is enough. Avoid treating a child who needs rest or extra support as uncooperative, and adjust the routine rather than demanding a perfect switch.
A Five-Minute Setup Routine
Use this five-step setup before any activity. A quick, repeatable start works better than preparing a complicated schedule.
- Choose one activity that matches today’s weather, available space and your child’s energy.
- Check age labels and safety: remove choking-size pieces, keep water play supervised and avoid heat exposure.
- Put out only the needed supplies and clear a comfortable play surface.
- Demonstrate the first action, then let your child choose a role or invent a variation.
- Finish with a short tidy-up; repeat a favourite rather than forcing the full session.
For a hot indoor afternoon, try cup stacking followed by a short sticker story. For a cooler outdoor morning, pair a treasure hunt with mini gardening. Keep the timing flexible and invite your child to choose how to continue.
Summer Play Safety: Heat and Supervision
For outdoor play, check the weather and air quality, offer drinking-water breaks, and choose shade or cooler times of day. Move crafts indoors during excessive heat; ice painting still needs a washable tray and prompt cleanup of meltwater. The CDC guidance on protecting children in hot weather recommends keeping cool and drinking fluids. Always supervise children around buckets and other water-play equipment, and empty containers after use. If the weather is dangerously hot or air quality is poor, switch to indoor play rather than forcing an outdoor plan. The CDC’s outdoor play safety guidance recommends shade, drinking-water breaks and adjusting activities to conditions.
Check age labels on craft supplies, keep choking-size pieces away from young children, and have an adult handle sharp tools. For children with sensory or mobility needs, offer seated versions, larger materials, or shorter sessions. The aim is enjoyable, accessible play—not finishing every project.
A Simple Seven-Day Screen-Free Summer Plan
Try a treasure hunt on Monday, ice painting on Tuesday, chalk letter matching on Wednesday, a cardboard city on Thursday, mini gardening on Friday, cup stacking on Saturday and a sticker storybook on Sunday. Swap days when the weather changes. For small homes, use tabletop versions; for mixed-age groups, let older children help prepare clues or tell the story. The plan is optional: repeat a favourite instead of forcing a new activity each day.
Screen-Free Summer Activity Checklist
- Pick one activity that matches the weather, space, and your child’s energy level.
- Check the materials and age guidance before you begin.
- Set out only the supplies you need to reduce setup and cleanup.
- Offer two or three activity choices instead of planning the whole day.
- For outdoor play, plan shade, water, and age-appropriate supervision.
- Stop or adapt the activity if your child loses interest; screen-free play does not need to last for hours.
Make a Reusable Screen-Free Activity Kit
Keep a small box ready so summer play does not require a shopping trip. Choose washable, age-appropriate supplies already at home: large paper, washable markers, reusable cups, clean cardboard, tape and picture-clue cards. Store scissors and other tools separately for adult use.
| Situation | Pack | Try |
|---|---|---|
| Preschooler with an adult | Large cards, chunky crayons, cups | Picture hunt or cup patterns |
| School-age child | Cardboard, paper, markers, tape | Cardboard city or storybook |
| Quiet or seated play | Large paper, cards, stable tray | Letter matching or shadow tracing |
| Outdoor play | Washable chalk, clues, drinking water | Treasure hunt or low obstacle route |
Check materials before each session. Remove damaged supplies, choking-size objects and loose strings when younger children are present. Dry and store reusable materials after play. Rotate a few items instead of buying new supplies every week.
A 10-Minute Screen-Free Play Rescue Plan
When the planned activity falls through, use this short routine. Timings are examples, not goals; stop sooner if a child needs a break.
- Minute 1: Offer two safe options: “Would you rather build or draw?”
- Minutes 2–3: Clear a play surface and set out only the supplies needed.
- Minutes 4–8: Build a three-cup tower, trace a shadow or invent a tiny cardboard town. Let the child lead.
- Minutes 9–10: Tidy together and ask which variation to try next time.
For children who like predictable routines, add an optional play slot to a kids’ morning routine or plan one activity with the free daily checklist template. These tools should support choice, not make play feel like homework.
Adapt Activities for Different Ages and Abilities
Children can share an activity theme without doing identical tasks. During a treasure hunt, a younger child can match picture clues while an older child writes them. For limited mobility, place clues on a reachable table and replace running with pointing or sorting. For noise or texture sensitivity, offer a quiet space, a visual first-step cue or crayons instead of sticky materials. Ask caregivers what adjustments are helpful rather than assuming one age-based version fits everyone.
Frequently Asked Questions
What are good screen-free summer activities for kids?
Good screen-free summer activities include a five-minute cup-stacking game, a picture-clue treasure hunt, shadow drawing, a cardboard city and a small planting project. Choose active play when children want to move, a tabletop craft when it is too hot outdoors, and a seated version when needed. One enjoyable activity is enough; you do not need to schedule every hour.
How can I reduce screen time during summer without making it a battle?
Give a short warning before the planned screen-time change, prepare one simple activity and offer two real choices: “When this episode ends, shall we stack cups or draw shadows?” Acknowledge disappointment while keeping the agreed boundary, then start the first step together. Keep the activity short and adapt it to the child’s needs rather than making play a punishment.
What if my child gets bored with an activity quickly?
Short attention spans during a new activity are common. Offer one variation—swap picture clues for riddles, turn a cardboard building into a shop, or ask the child to teach you the game. If interest fades, tidy up and try another day. The aim is a positive break from screens, not completing a fixed schedule.
What screen-free summer activities work in a small apartment?
In a small apartment, try a three-cup stacking challenge, a sticker storybook, a two-box cardboard city or letter matching on a table. Put supplies on one washable tray, keep exits and walkways clear, and choose quieter versions for shared buildings. These can each begin in about five minutes with materials you already have.
Which activities are suitable for preschoolers?
Preschoolers can try picture-clue treasure hunts, large-cup stacking and big-paper drawing with close adult guidance and one step at a time. Avoid broken or uninflated balloons, choking-size pieces, and sharp tools; follow age labels and adapt each activity to the child.
Conclusion
Screen-free activities help children stay creative, active, and connected with family during summer. Simple games, crafts, and outdoor adventures can create meaningful memories while reducing screen time in a fun and healthy way. For a practical first step, pick one of the ten ideas, gather its listed supplies, and offer a five-minute trial today. Keep a note of which version your child enjoyed so you can repeat it without planning again. Keep the plan flexible: a short, safe, enjoyable activity is more useful than a packed schedule.